Why we’re here, how we approach graphics at The New York Times and making the sausage of the internet
After doing basic first-day-type activities and introductions, I’ll give a short lecture and then we’ll get right into using Github.
Lecture
Lab
Before we do anything super useful or innovative with our soon-to-be-shiny data skills, we need to be able to have a place to write our files so they are public on the internet. This exercise will make sure everyone is properly set up to publish stuff to Github.
Github might at first seem tricky and a little bit of overkill, but it’s the industry standard for sharing code. Nearly every major code library you will encounter these days is hosted on Github.
More relevant for this particular class though, Github offers free hosting of websites. For instance, this entire syllabus is being served from Github for free (as is Kevin’s porfolio site). So it’s pretty handy.
Signing up for Github
If you’ve never used Git or Github before, don’t worry, it’s not as scary as it may seem at first. It’s basically like Dropbox for programmers, with enough goofy names and concepts to make it all feel a little more complicated than it really is.
-
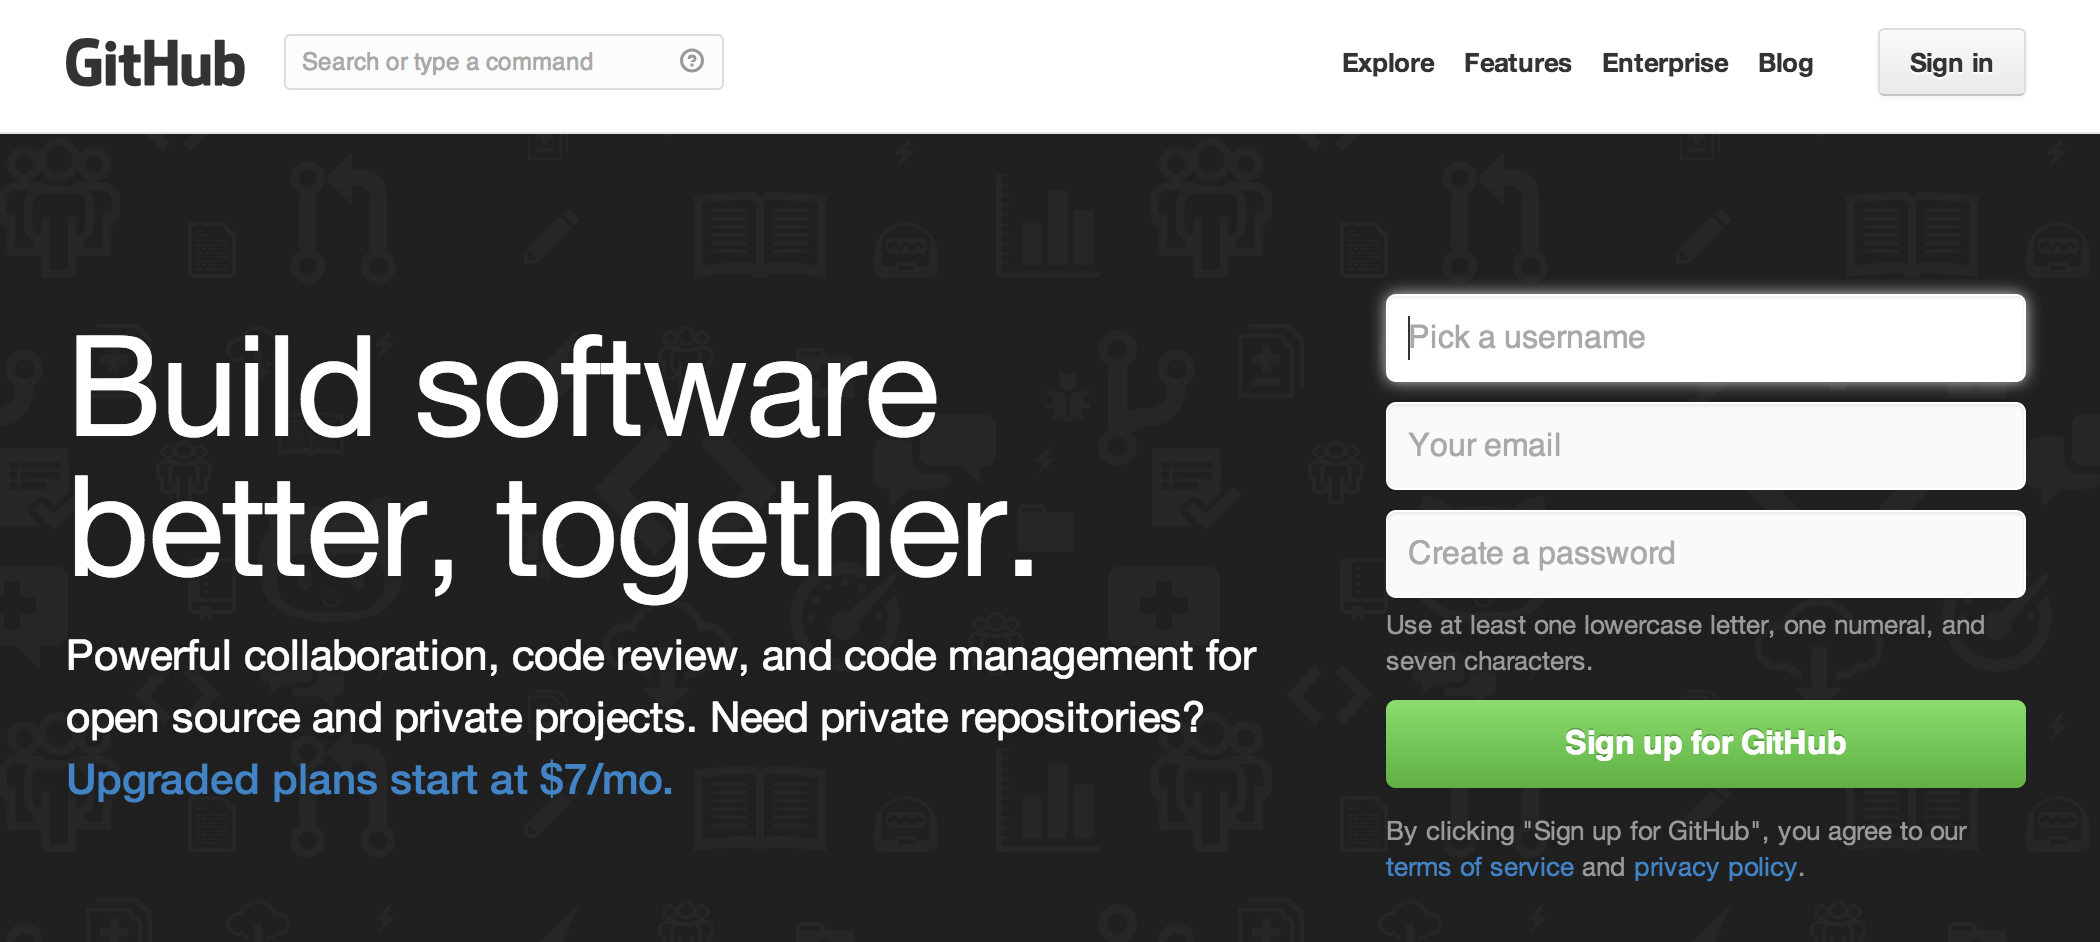
First, go to Github and create a username and password, etc.
-
Once you are logged in, click on “Create a repository.” You should see this screen:
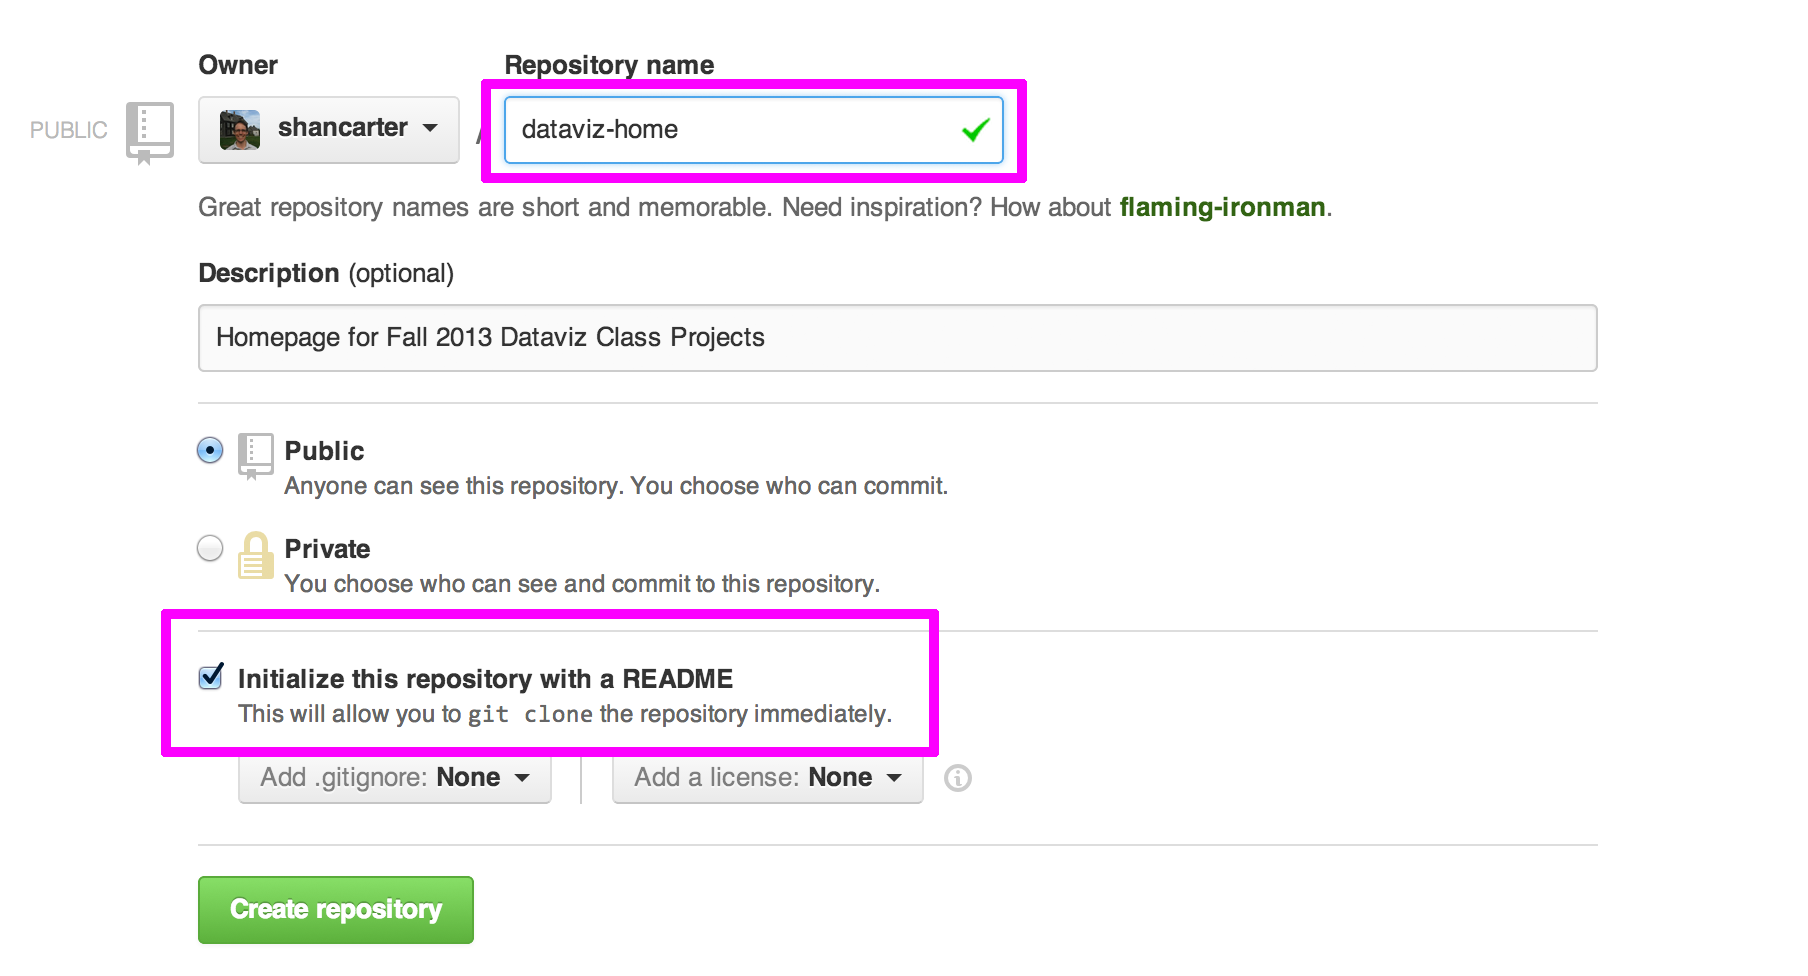
Name your repo “dataviz-home”.
Make sure you check “Initialize this repository with a README”.
Finally, click the button that says “Create repository.”
-
You’ve just intialized a Git repository! Nice. Now we need to copy it to our computers.
Creating a Home For Our Repositories
Some of this might seem kind of fussy, but since we’ll be doing a lot of debugging on everyone’s machines, I want to make sure we’re all working the same way. So, first let’s create a home folder for all our class repositories.
-
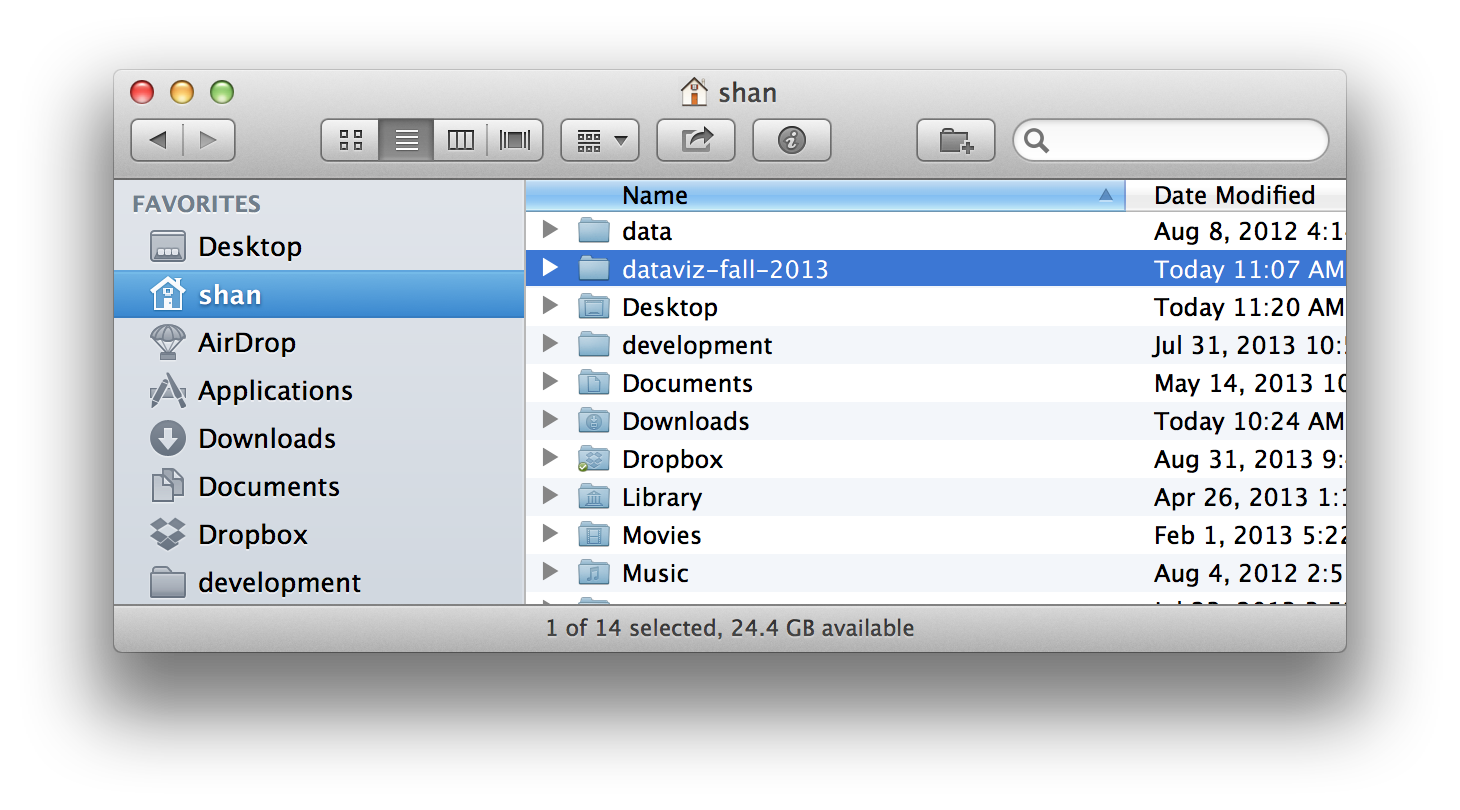
Go to your home directory, it’s the one in your sidebar with a house icon. Mine is called “shan” and the keyboard shortcut to go there is: ⌘⇧H
-
Inside this folder, create a new folder called “dataviz-fall-2013”. This is where we’re going to store all of our repositories.
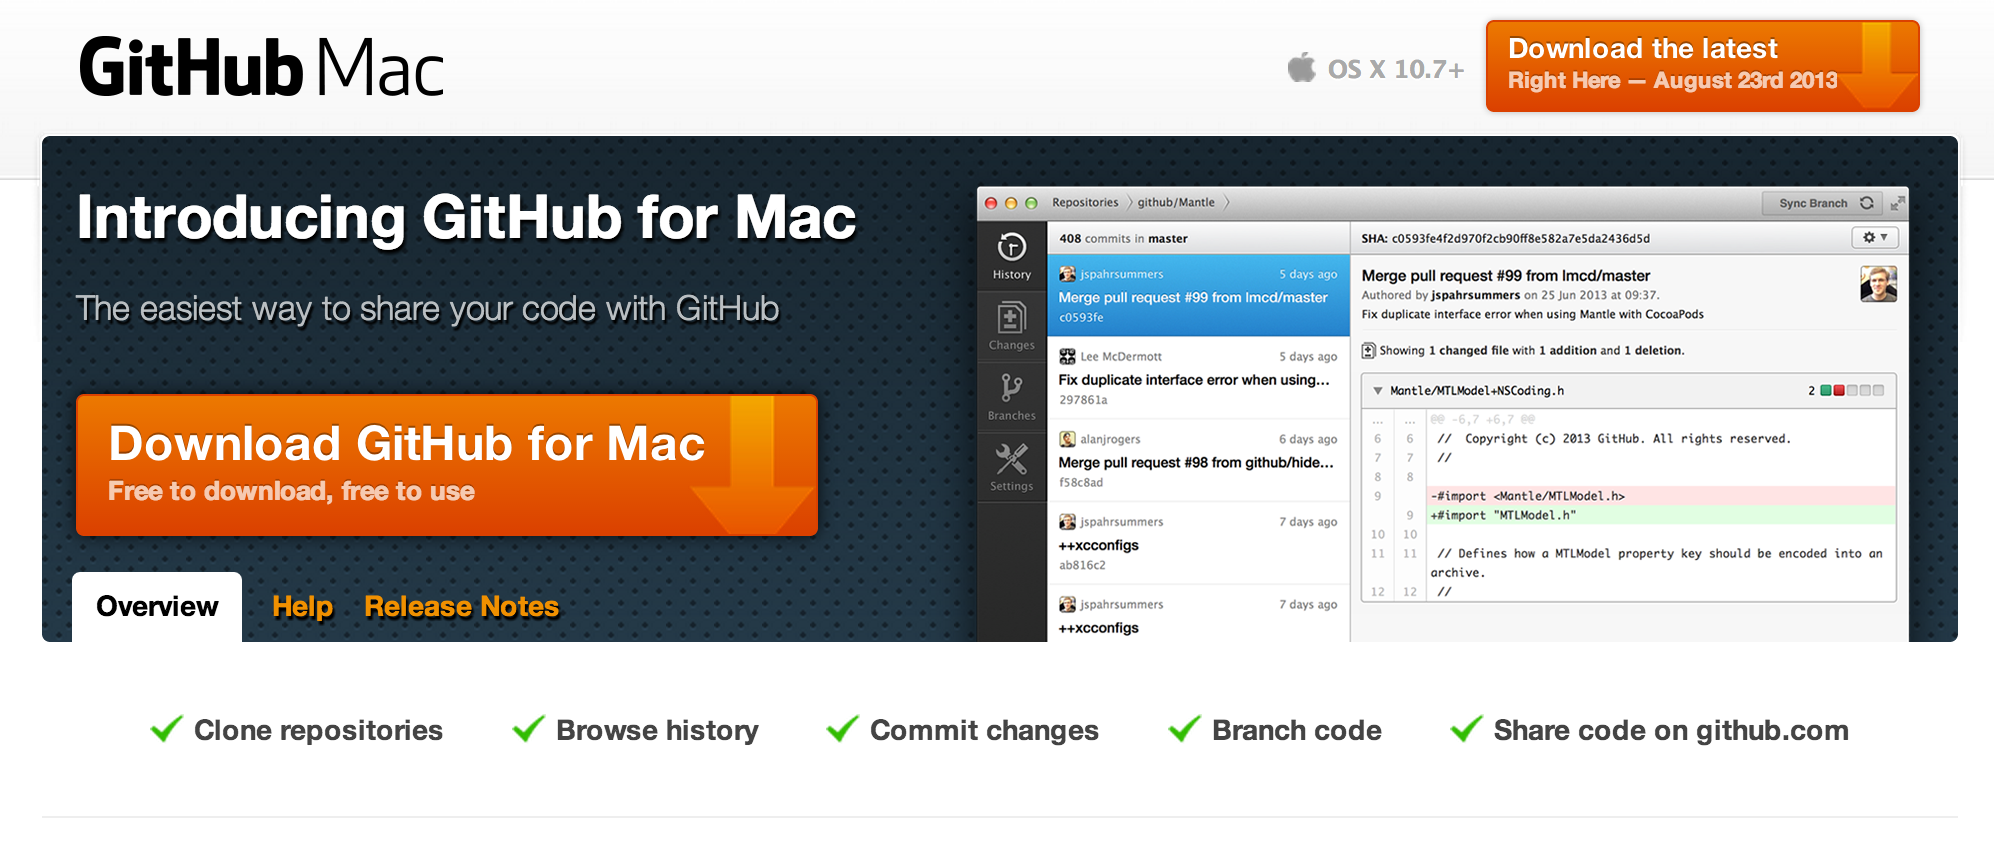
Installing Github on Your Computer
Now you’ll need the Github application on your computer so you can edit and sync your projects.
-
Download and install the Github application. Mac or Windows.
(If you get stuck in the future, there are good help pages for Mac and Windows.)
-
After installing, when you first launch the application it will ask you to move it to the Applications folder. Say “yes”.
-
When it re-launches, it’ll step you through a setup process. You’ll need to enter your shiny new Github credentials, you’ll want the command-line tools, but you don’t need to “add local repositories”.
-
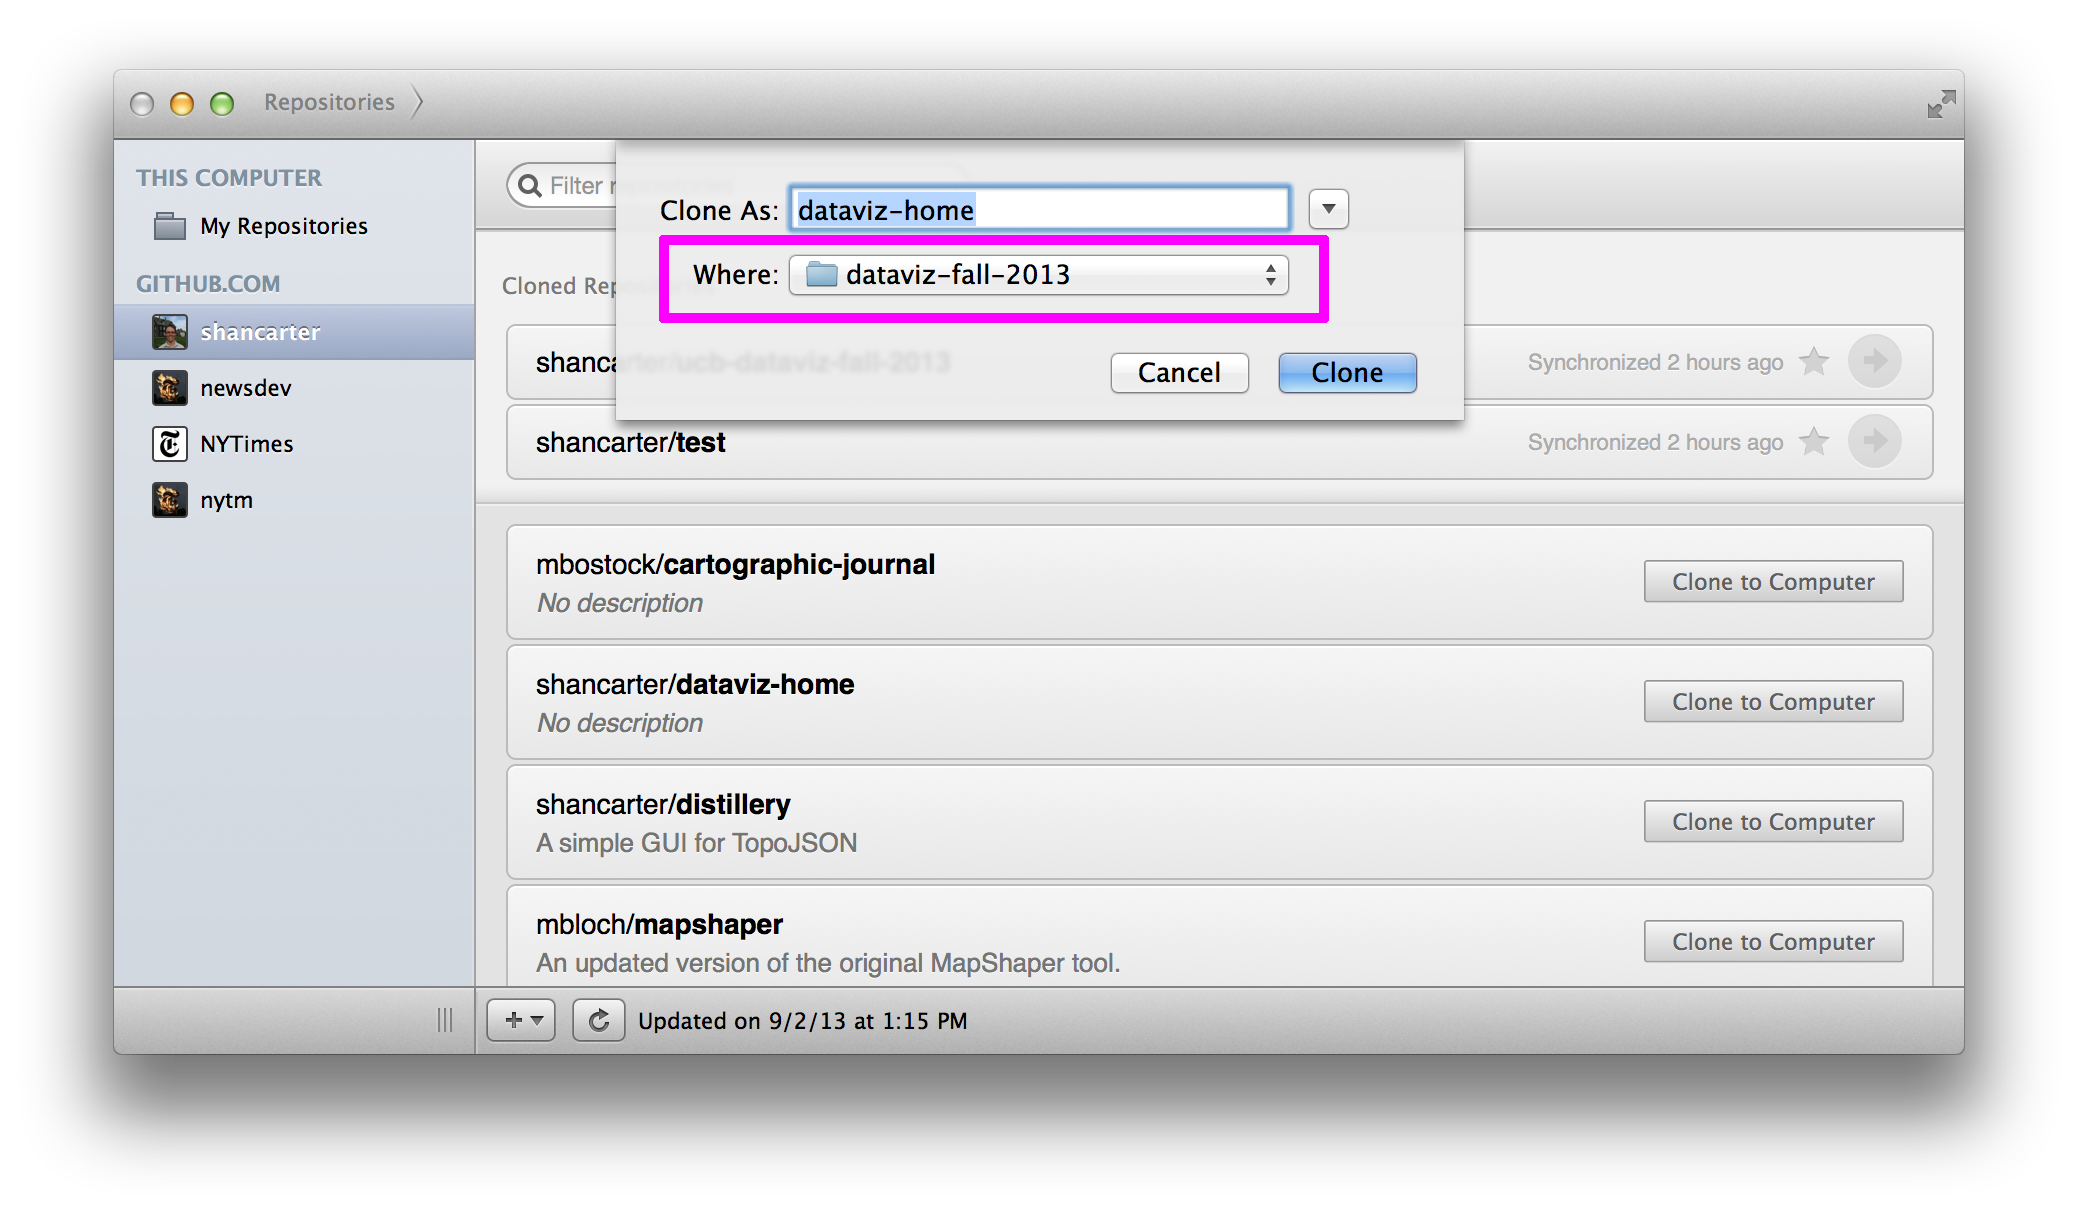
You should now see a window that lists one repository: “dataviz-home”. Click the button next to it that says “Clone to Computer”.

-
A dialog window will popup. Navigate to your “dataviz-fall-2013” folder in your home directory. Click “Clone”.
-
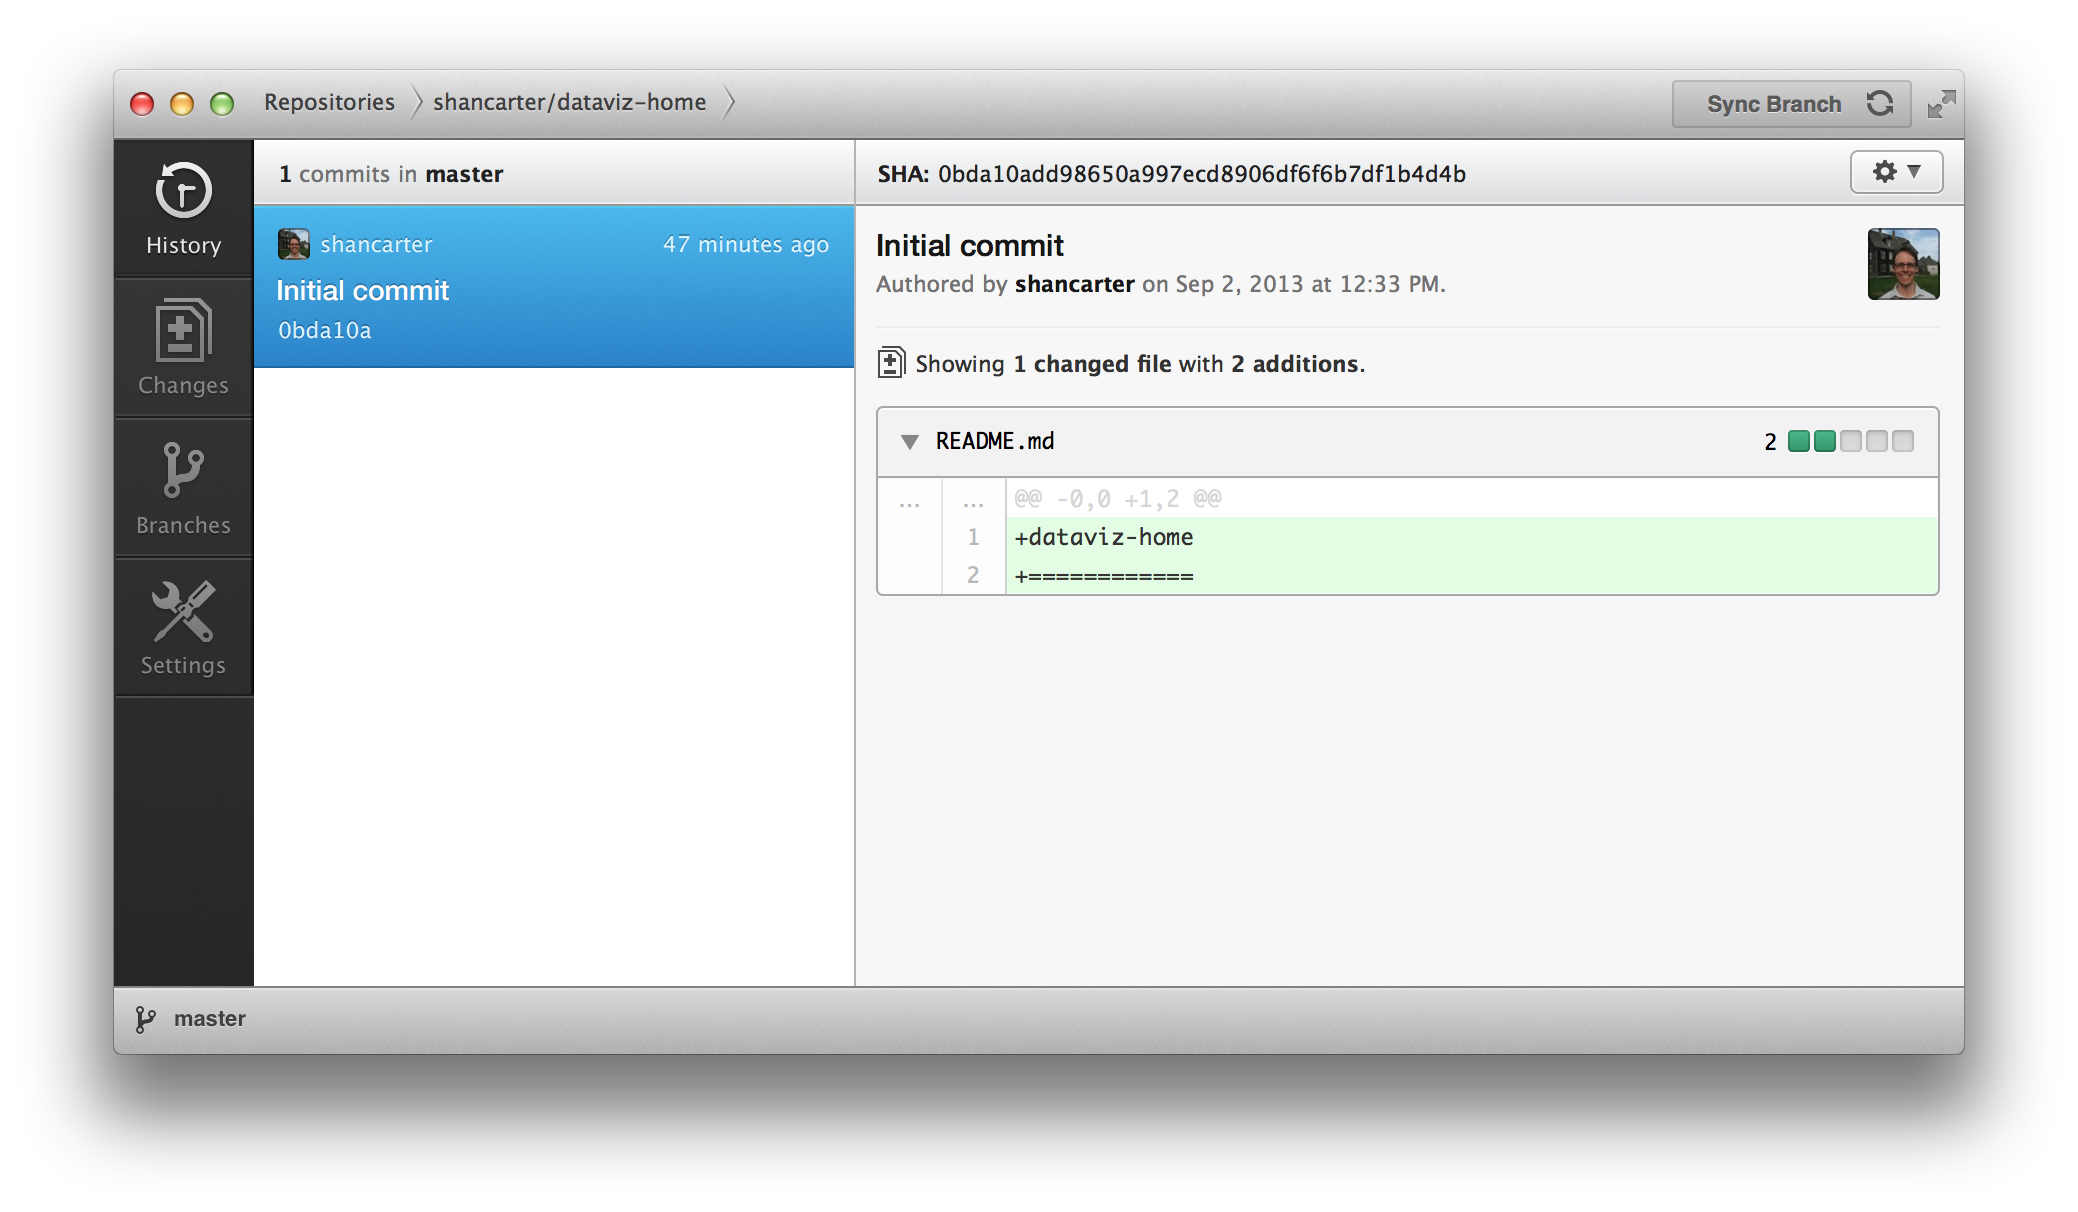
Click on the little arrow next to your repo name and you now can see the whole edit history for that repo. You should only have one entry, and it’ll be called “Initial Commit”.
-
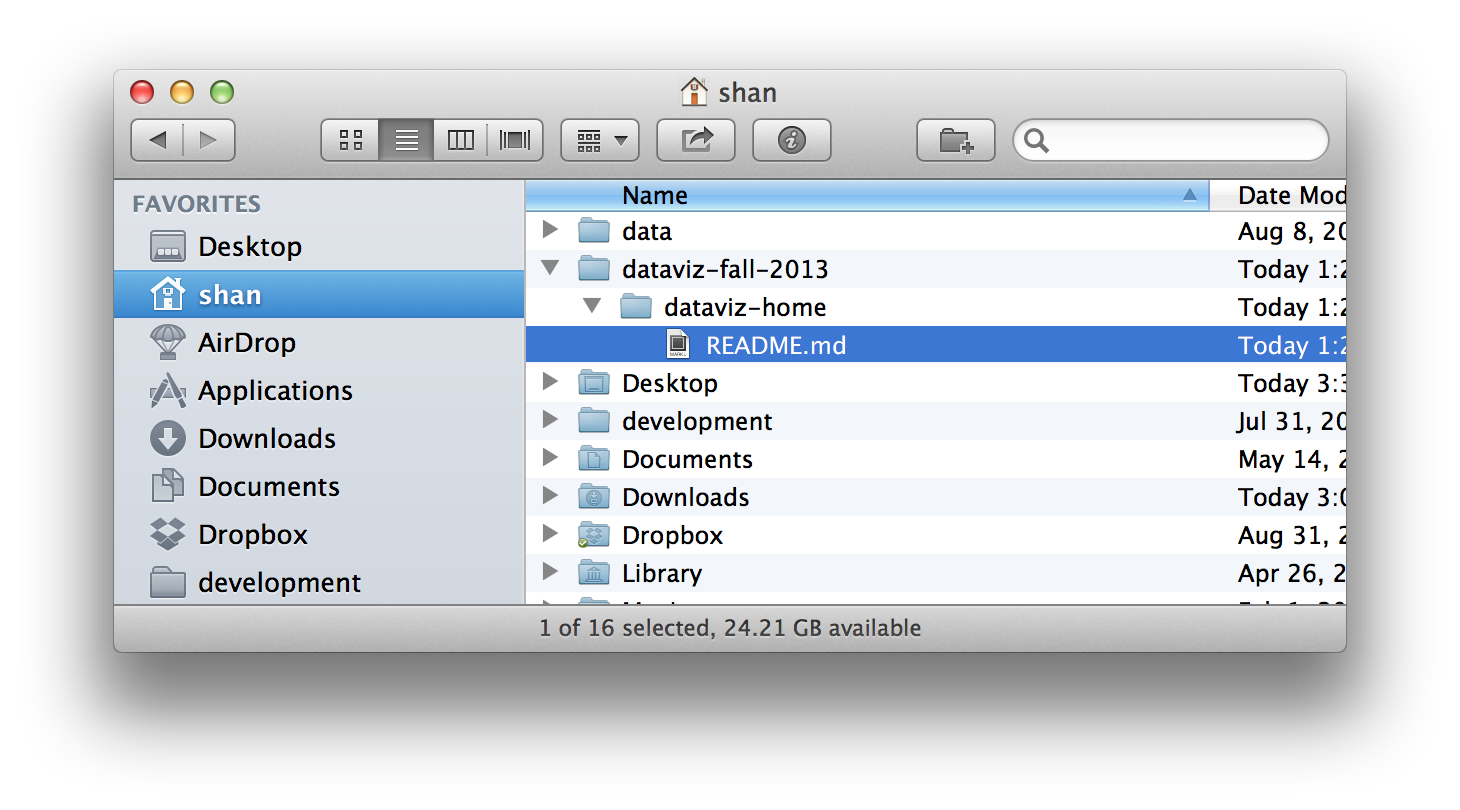
Now, go back to the Finder and find your home directory. There should be a folder within “dataviz-fall-2013” called “dataviz-home”, with one file inside of it.
Great, you should be all setup to make your first edit in your new repo, but first we need to take a short detour for a good text editor.
Installing Sublime Text
If you already have a text editor you like, feel free to skip this section. If not, then it’s probably best you install Sublime Text.
-
Download and install Sublime Text.
-
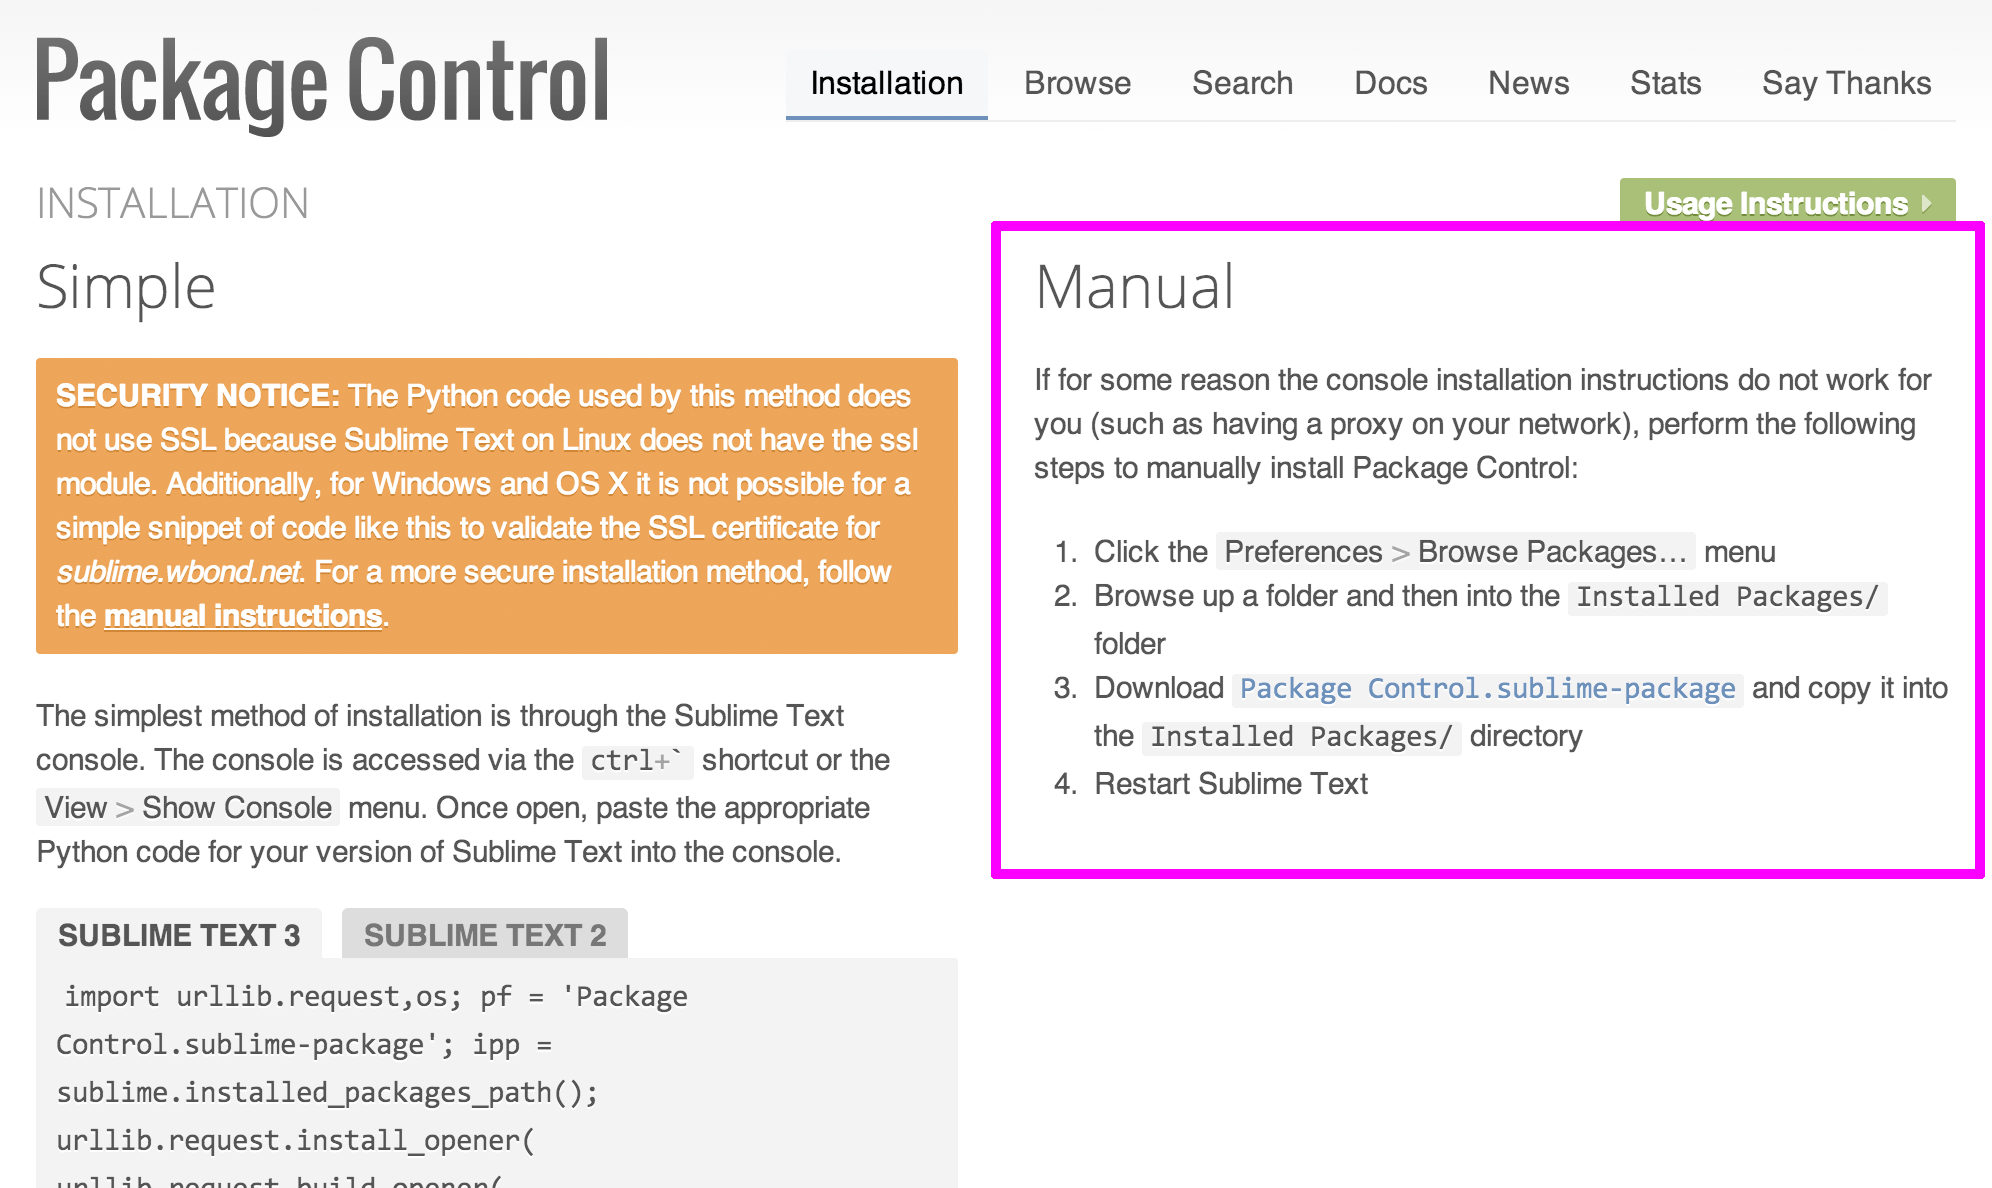
To make the most of Sublime, we’re also going to install a package manager for it (packages are like extensions that add features). Follow the “Manual” directions for the Sublime Package Manager.
-
Once installed, here are some instructions for how to install and remove packages.
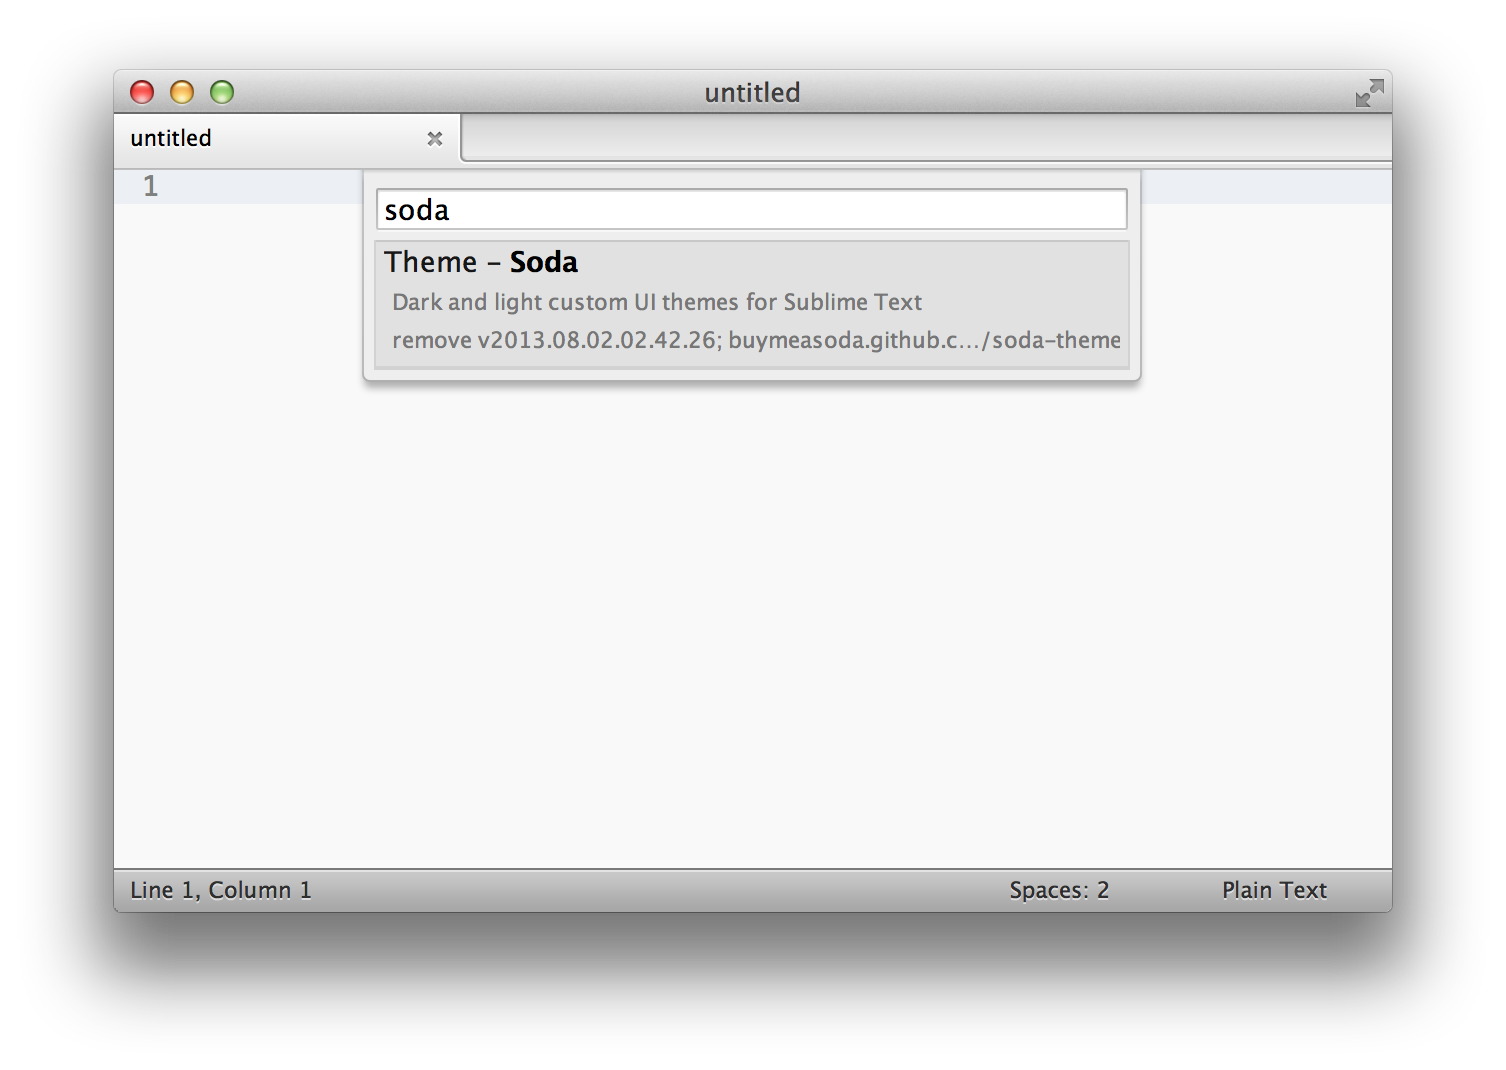
The basic pattern is: You open a window in sublime, hit ⌘⇧P, then type “install” and choose “Package Control: Install Package”.

Next, type in the name of the package and hit return — “Soda” in this instance.
-
I recommend not installing too many packages, as it’s best not to gunk up sublime with too many of these, but you can browse them all here if you’re curious. Go ahead and install these three: Theme - Soda, SideBarEnhancements and ColorPicker;
Finally, Making Something
Let’s try to put it all together and actually add something to our repo.
-
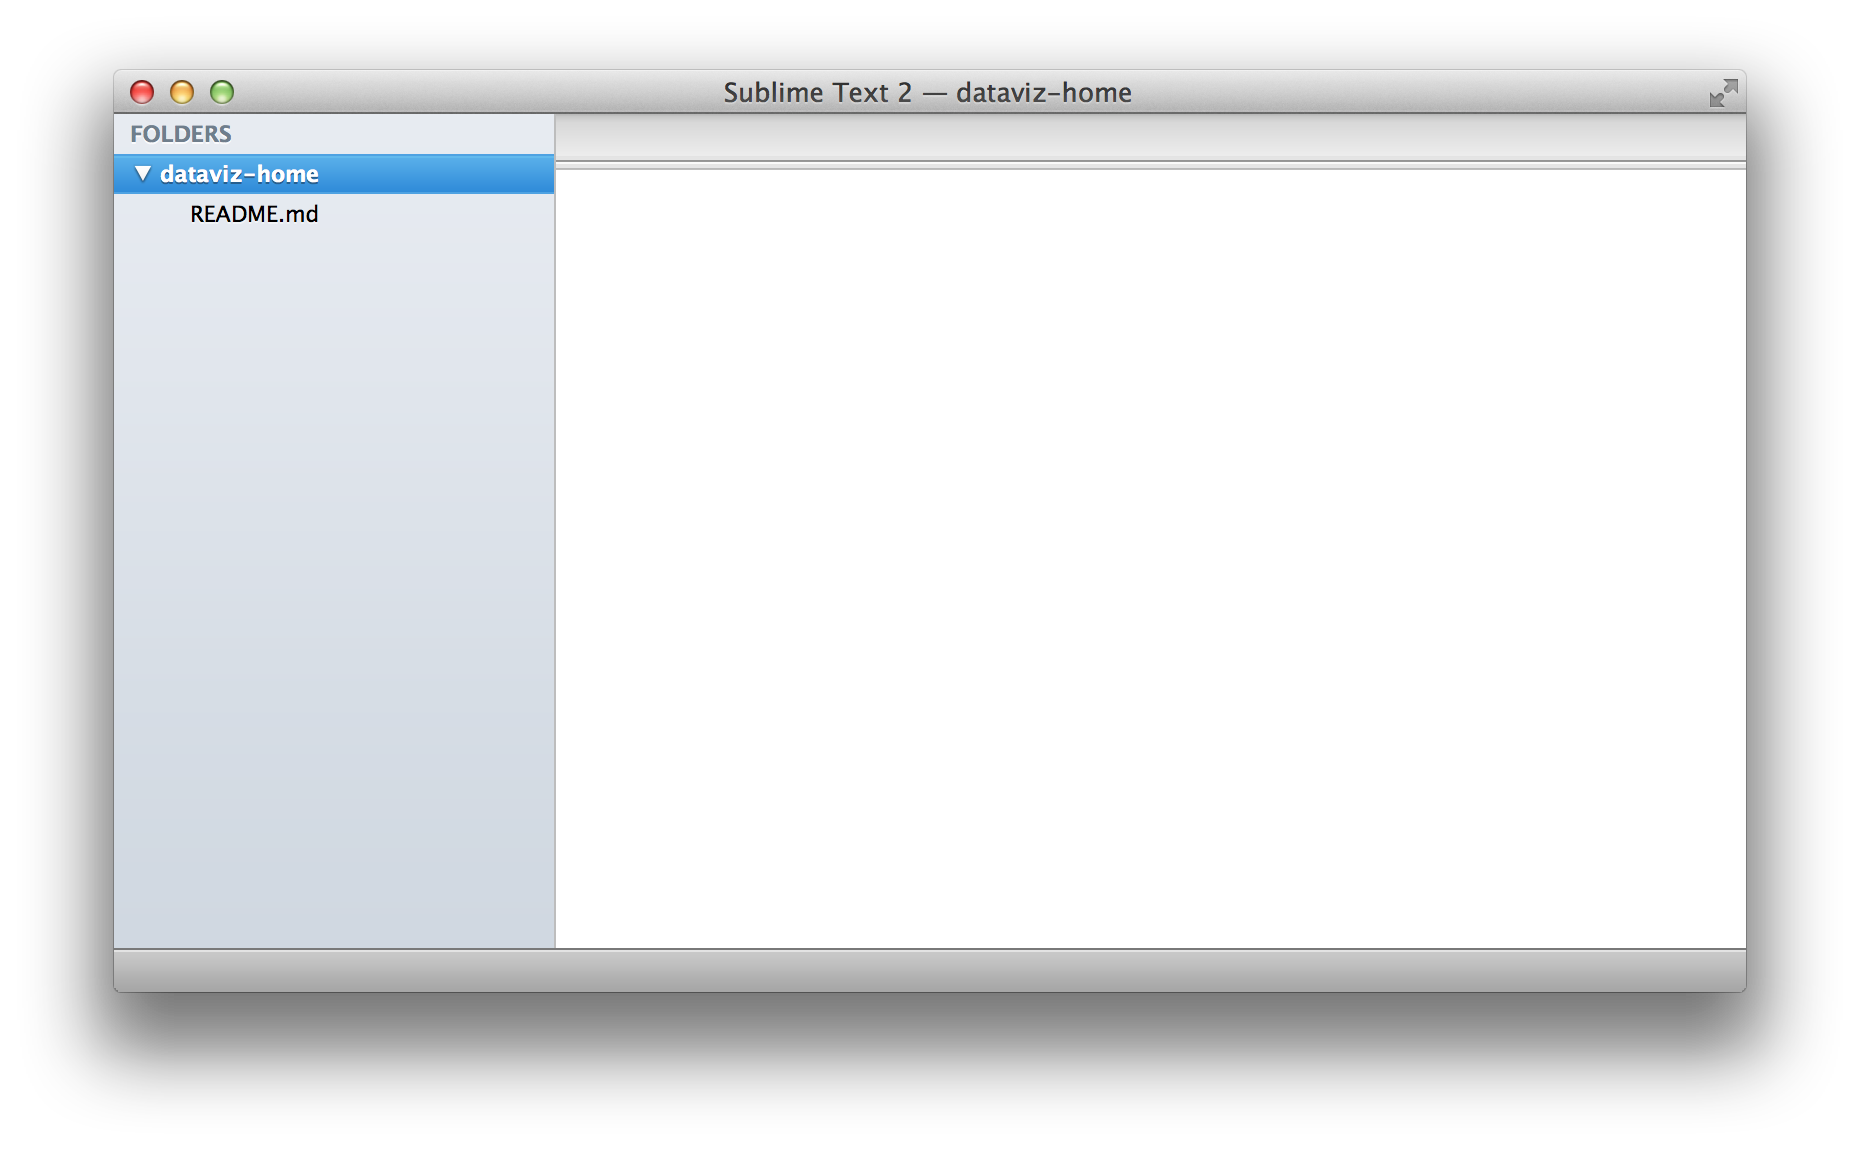
Open up our project folder “dataviz-home” in Sublime Text. You can do this one of two ways: 1. Go to File > Open and choose the “dataviz-home” folder. 2. Drag the “dataviz-home” folder onto the Sublime Text application icon in the dock. Either way you should end up with this:
-
Now, create a new file. The easiest way is to right-click on the folder named “dataviz-home” in the sidebar.
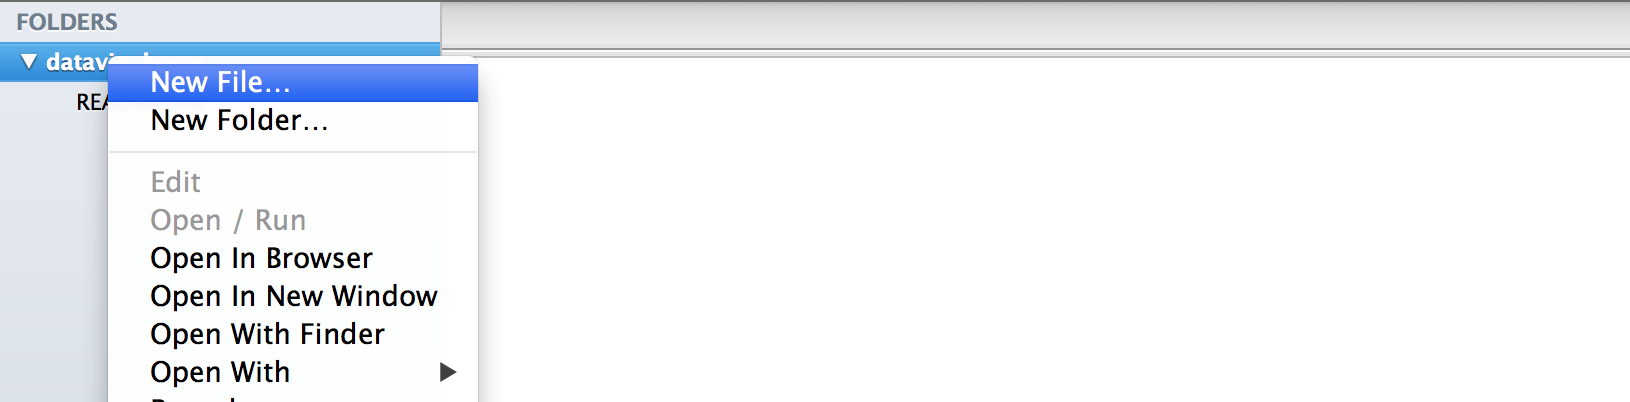
A small text field will open at the bottom of screen. Type in “index.html” and hit return.

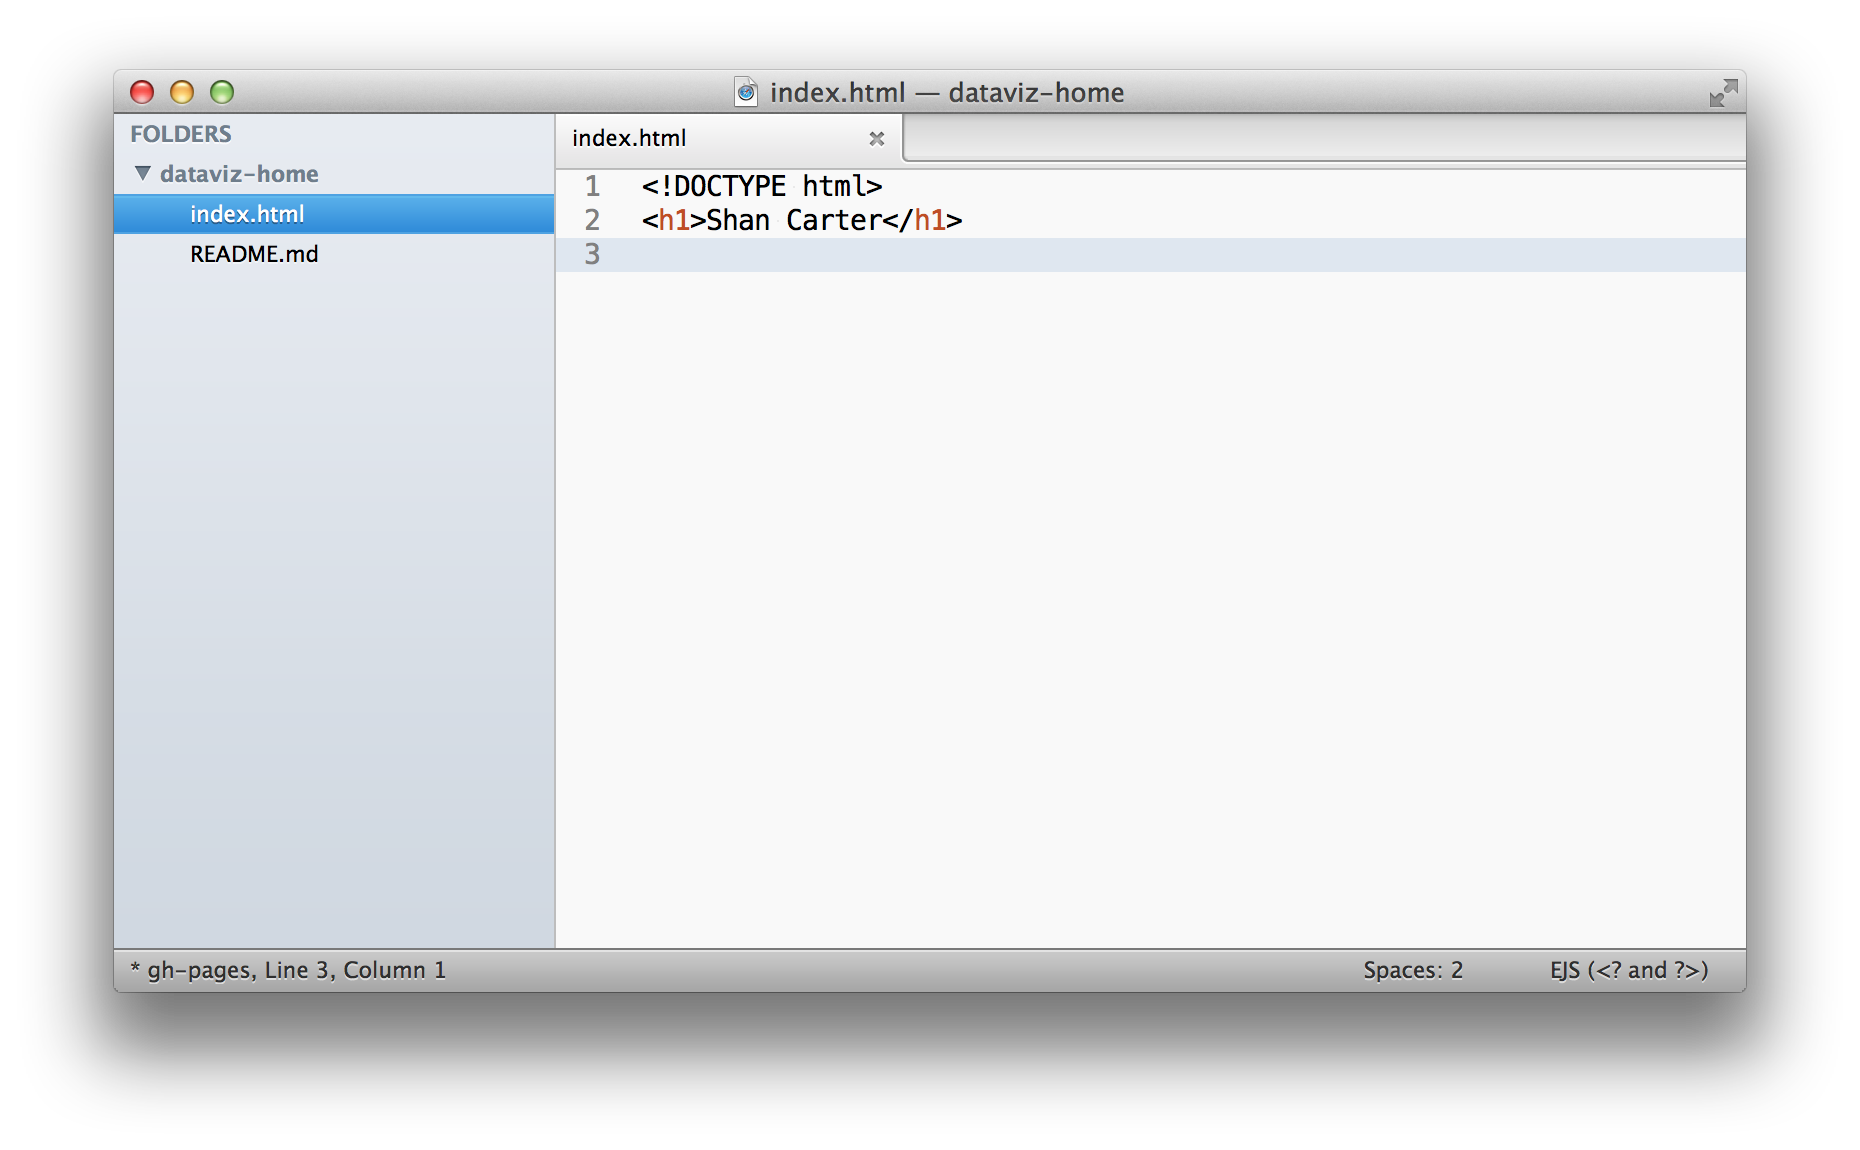
This is what you should end up with in the end:

-
Enter in some HTML. To get started, here is the bare minimum:
-
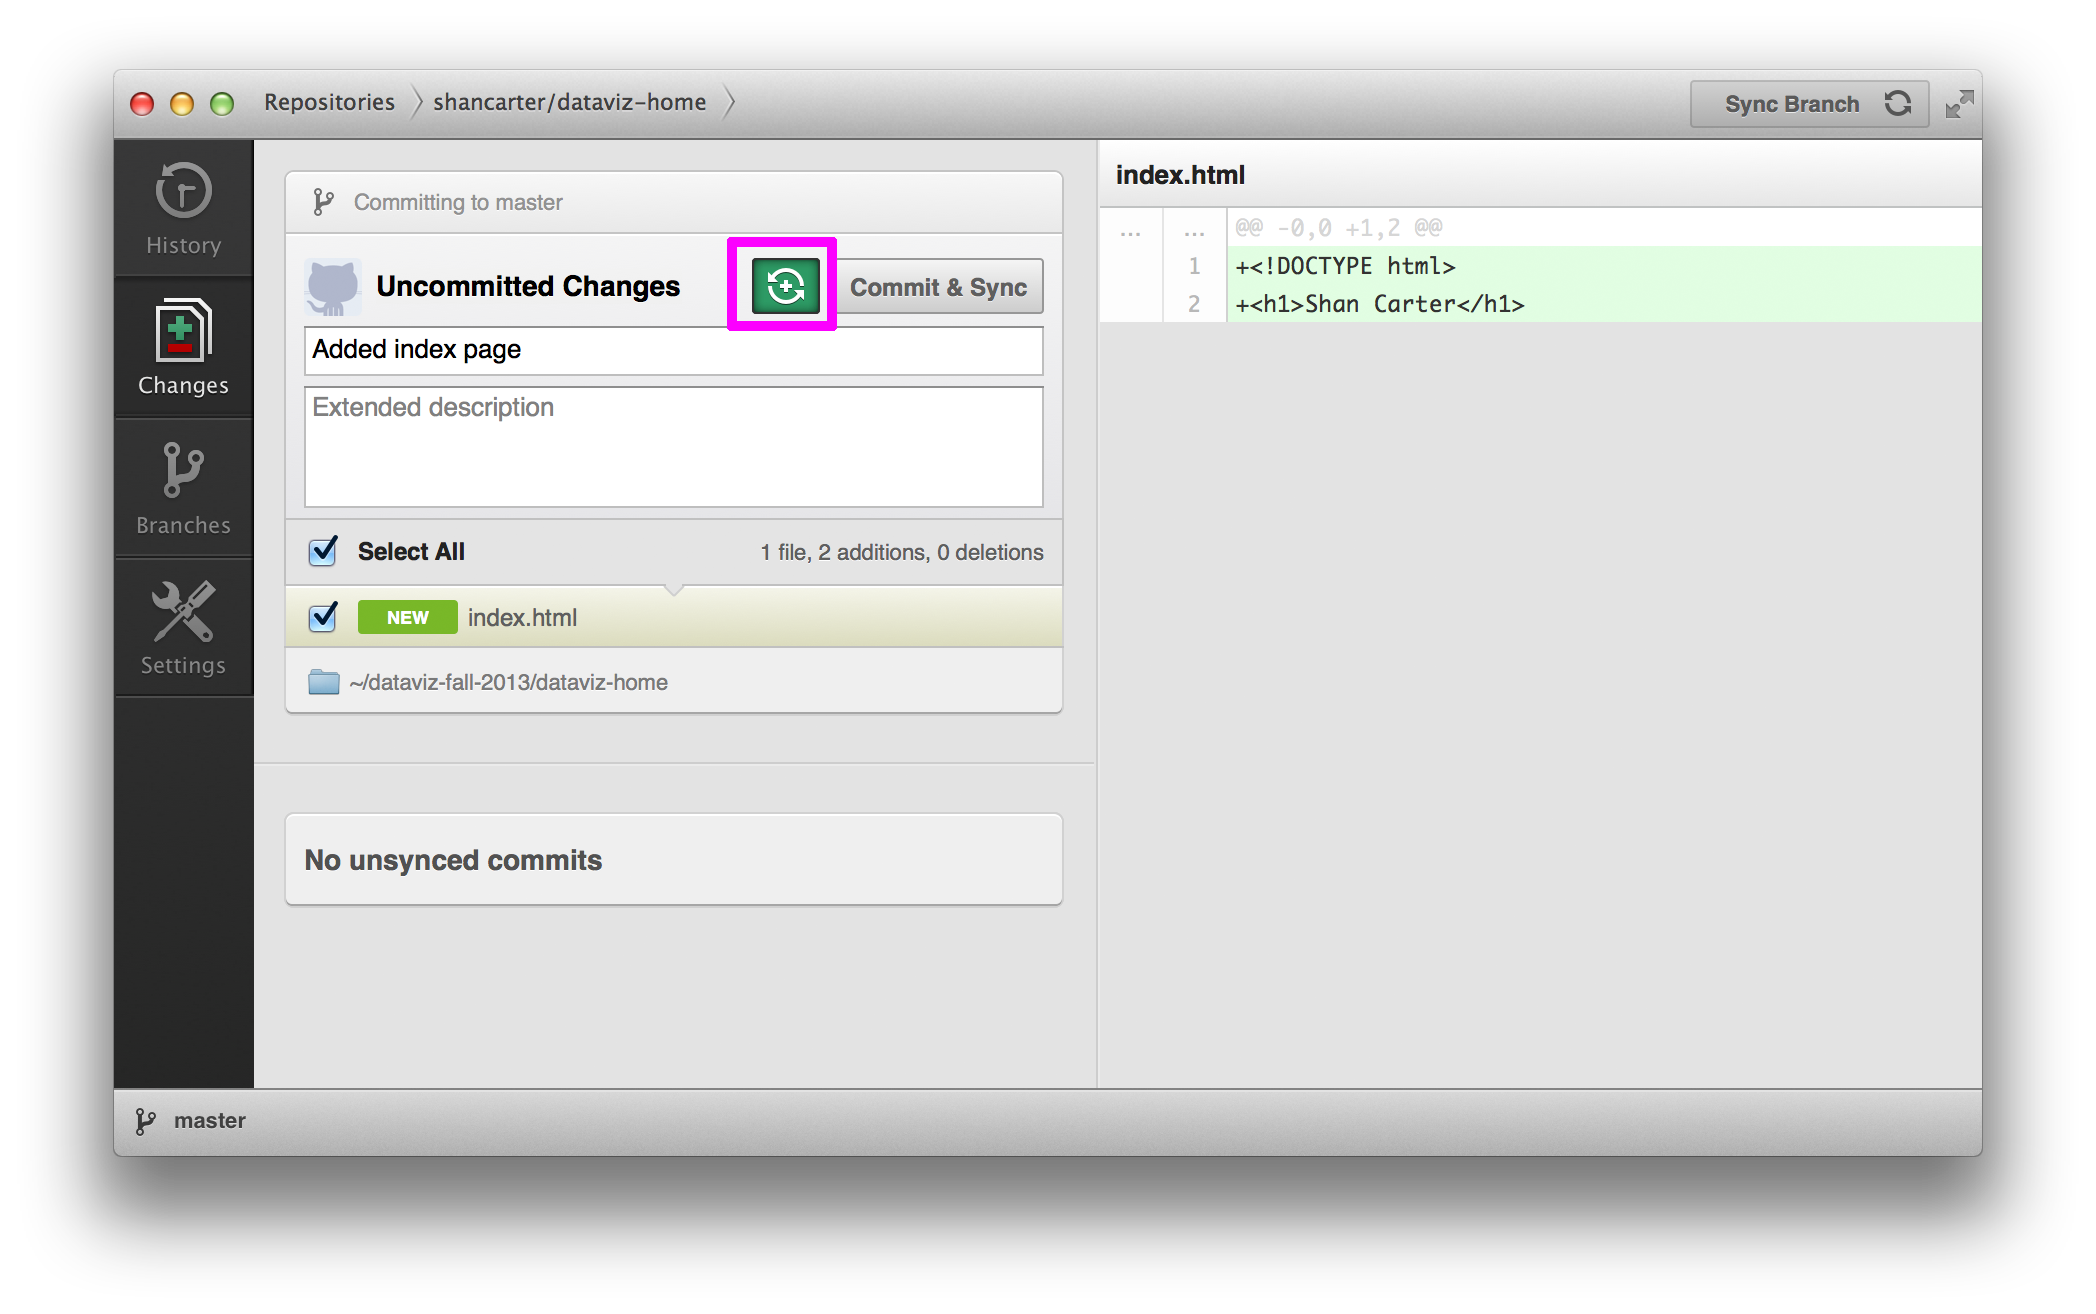
Now we need to save those changes back up to Github servers. First, go to the Github app and click on the changes tab. You should see all your changes listed there.

-
In Git, you bundle changes together into a “commit” which requires a short description. I’ve typed in “Added index page”. We also want to click the button with a plus and rotating arrows to mark that we want to automatically sync with Github servers each time we make a commit. Finally, push the button that says “Commit & Sync” to make your commit and sync it to the Github servers.
-
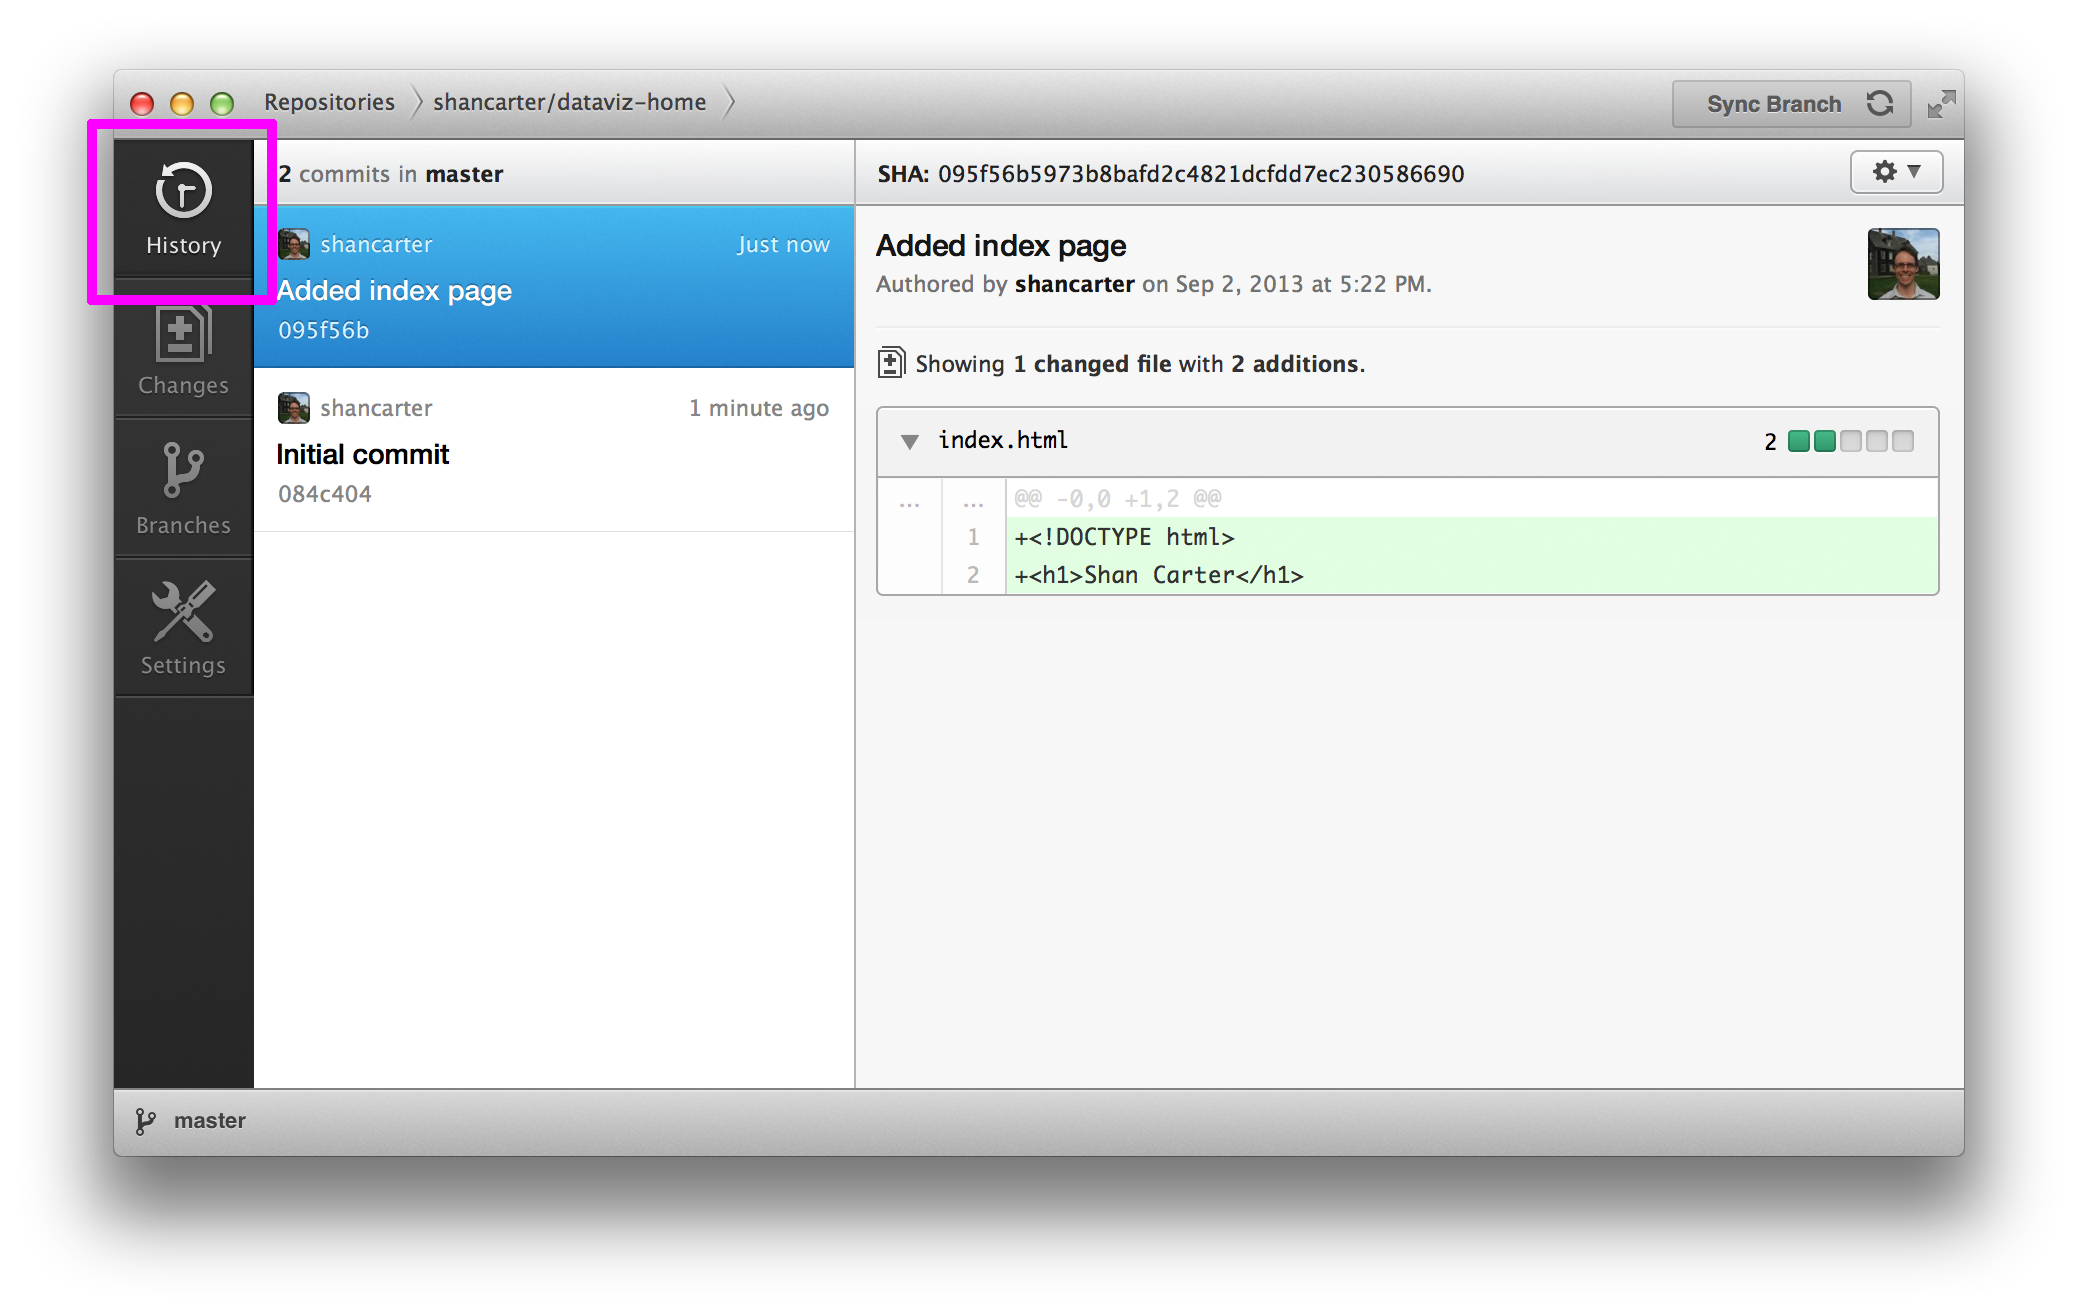
Now click over to the “History” tab and you should see two commits listed. You can click back and forth on the commits to see what changes were made.
-
Let’s see what it looks like on the Github website. Click on the settings tab, then click the button that says “View on Github”.
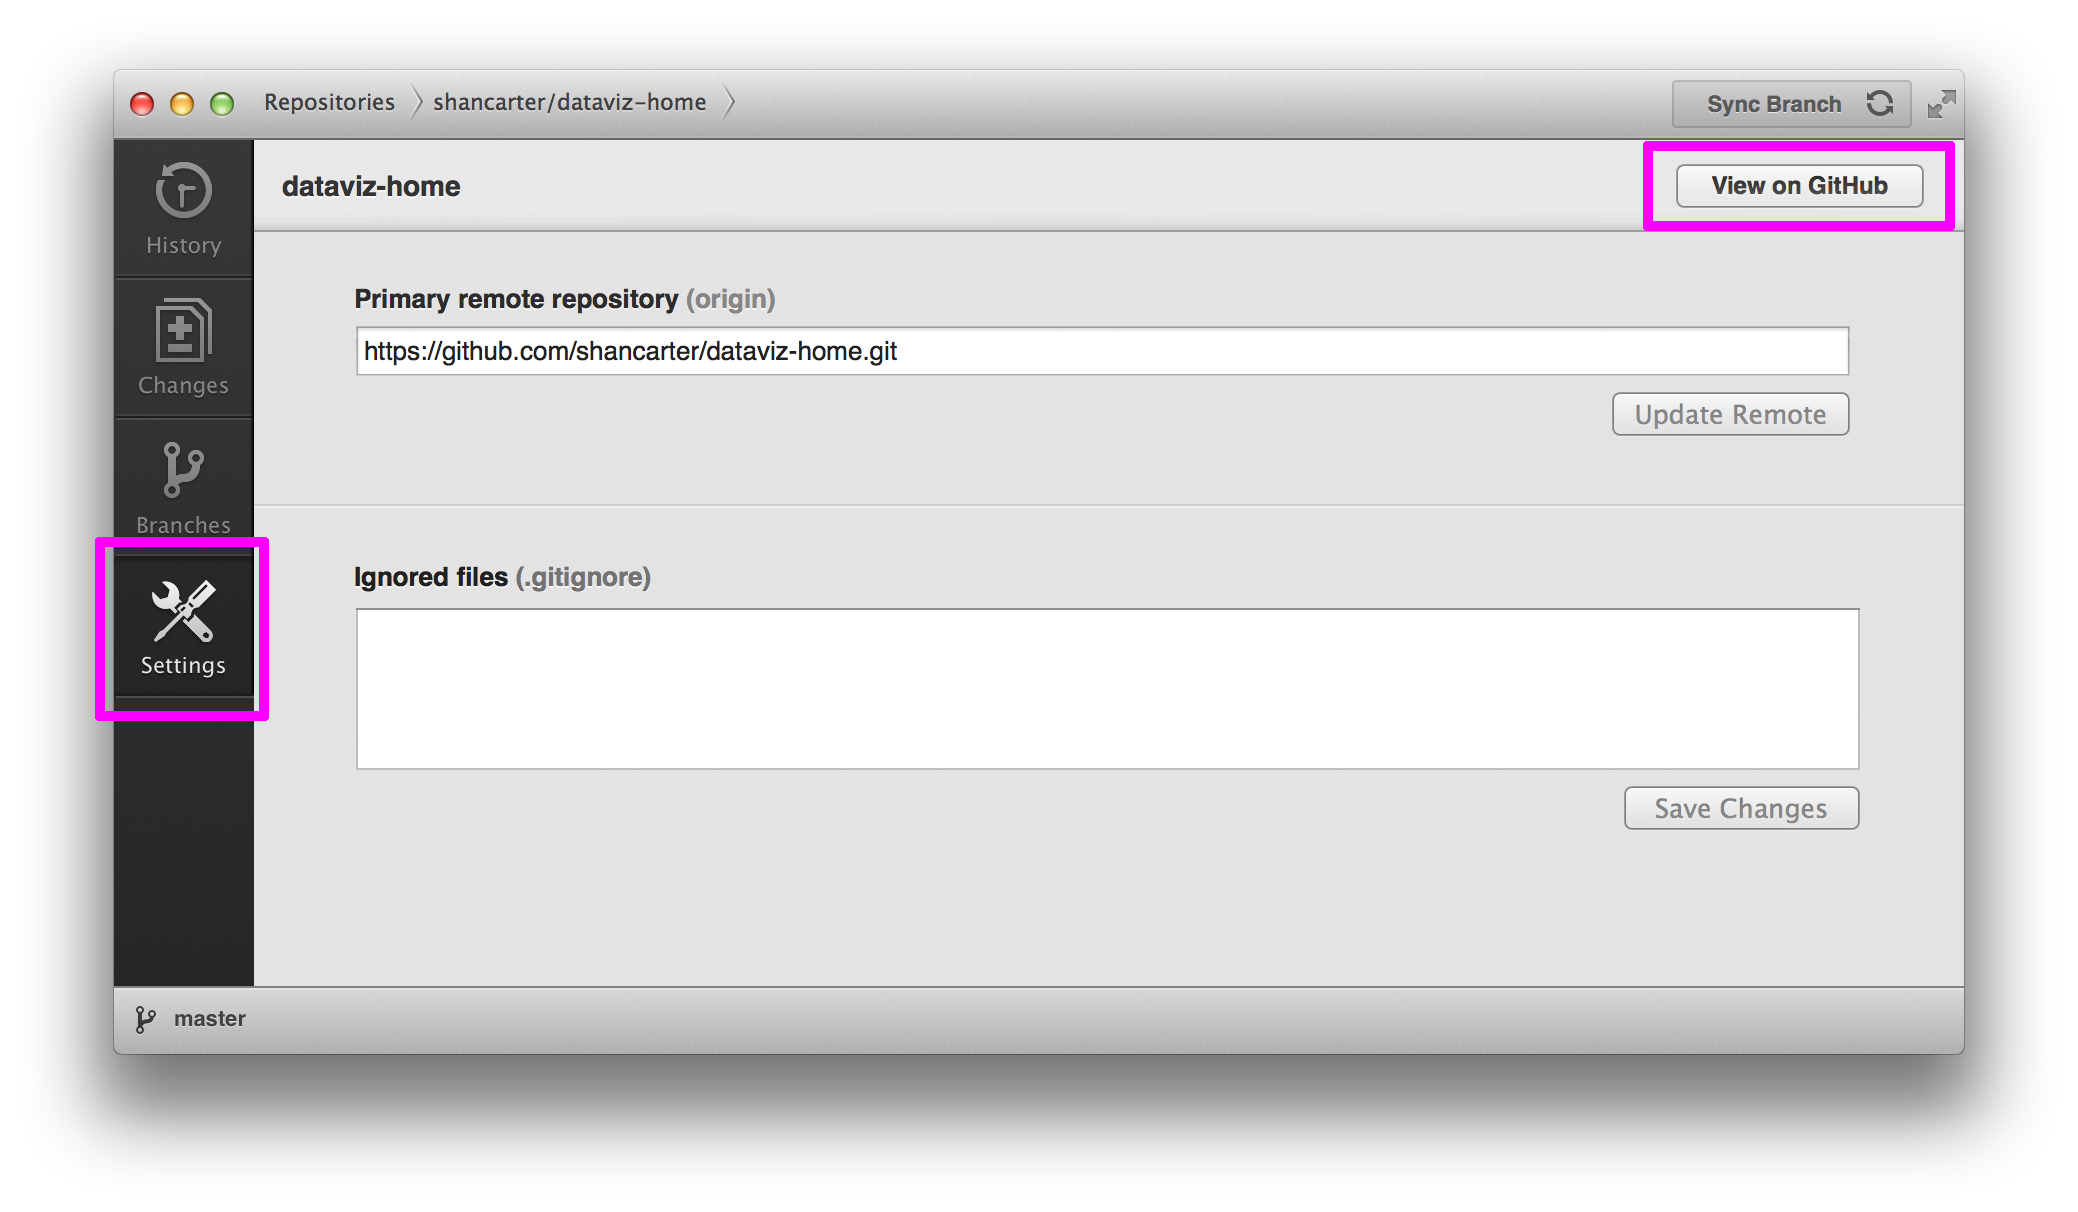
-
Now you should see a version of your project live on Github servers. You can even edit your files through this website! For example, let’s add some text our homepage. Click on the “index.html” page.
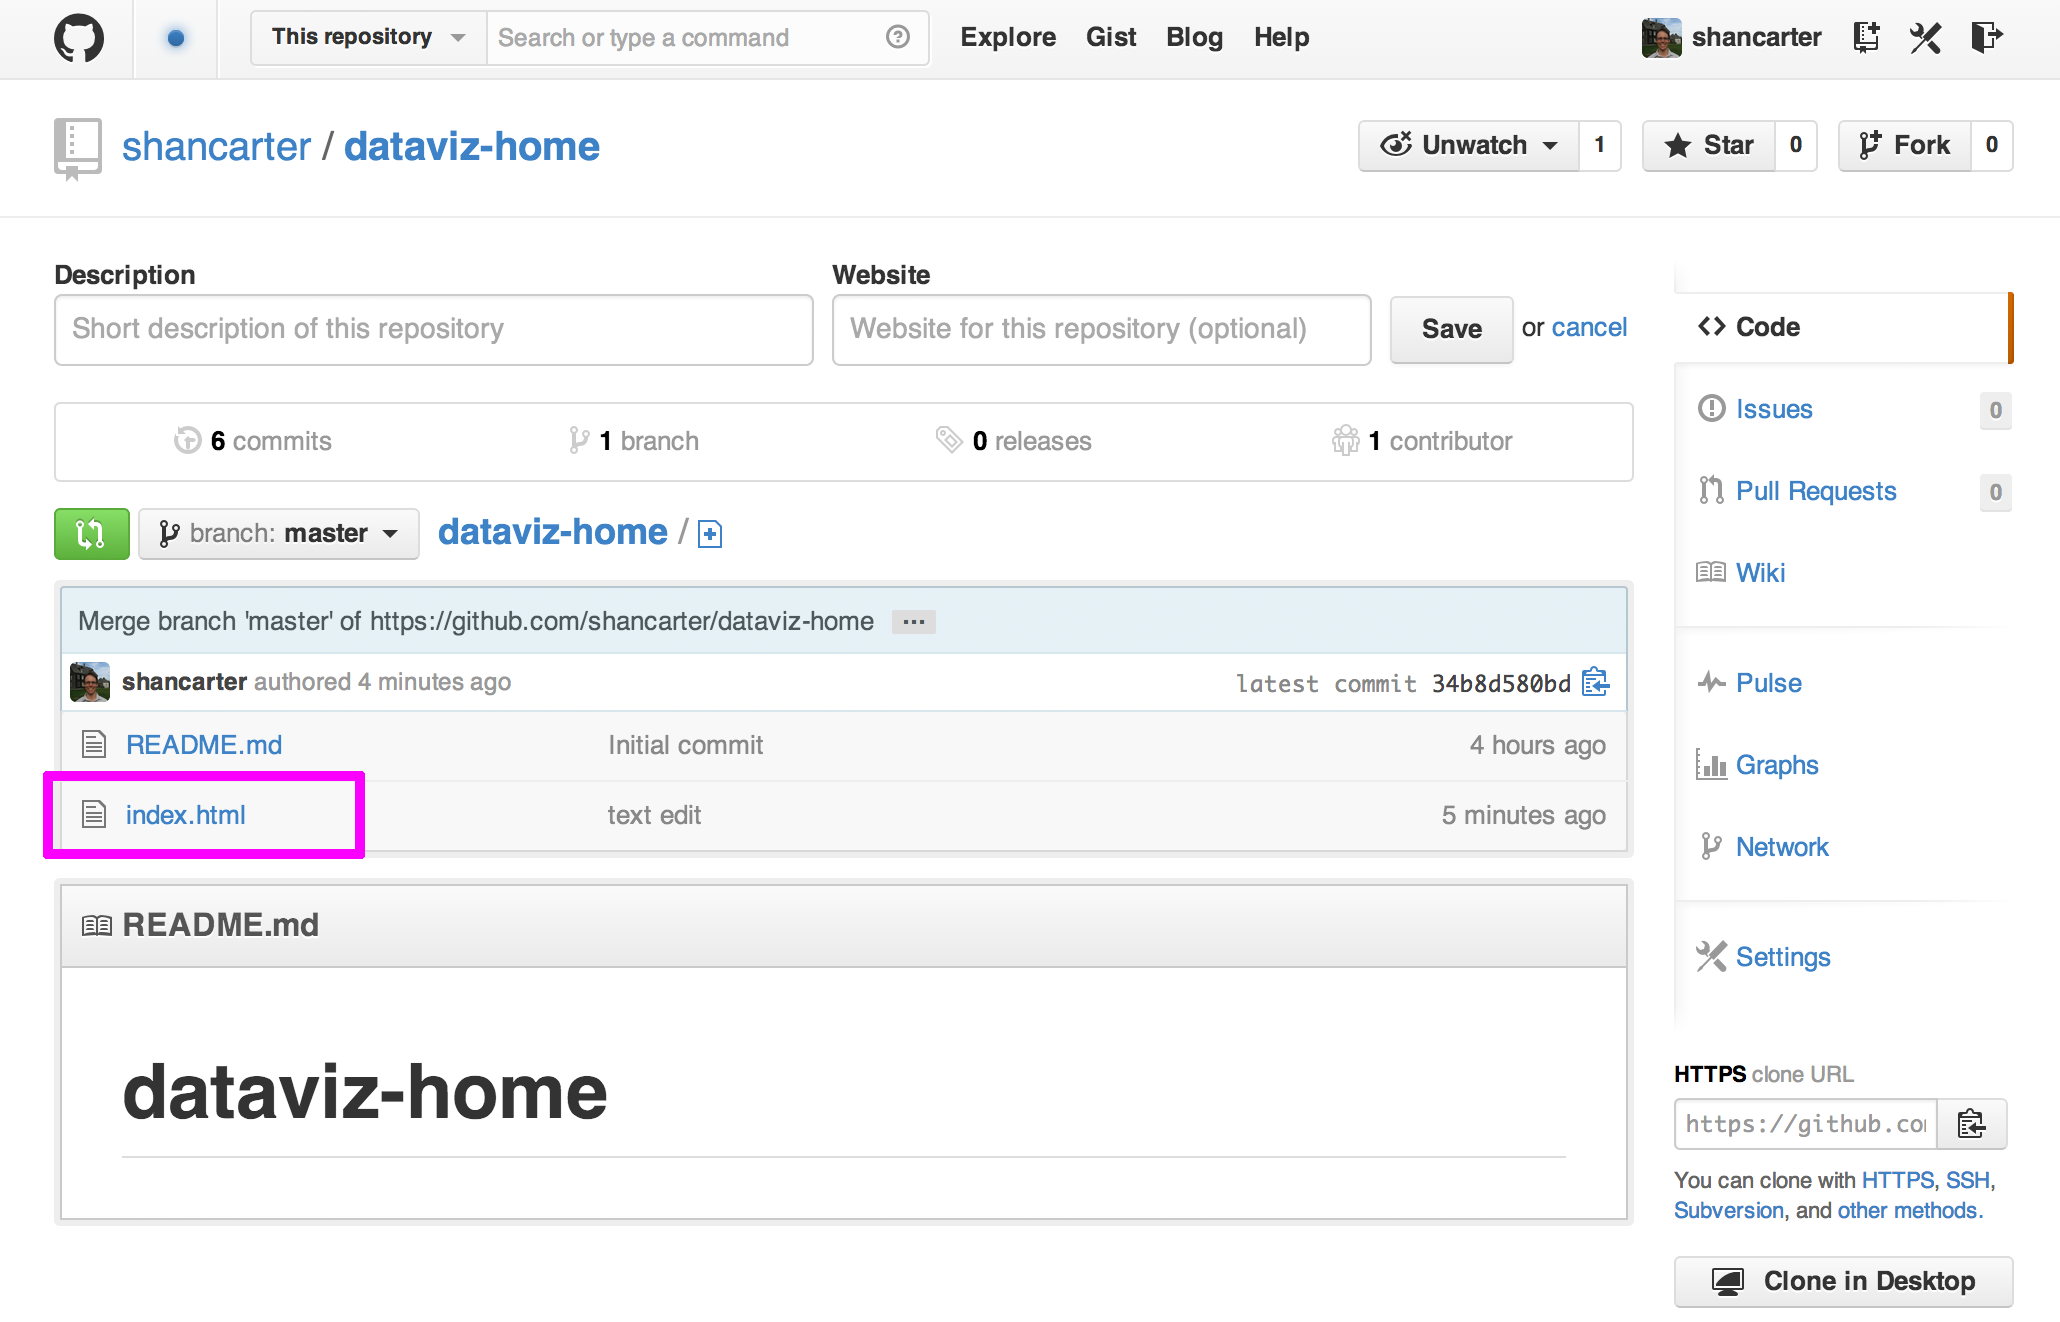
-
Now, click the “Edit” button.

-
Once you’ve added a line or two of text, scroll down to the bottom and click the “Commit Changes” button.

-
Now, we need to sync those changes back to our computer. So let’s go back to the Github app and click on the “History” tab. Click the button on top labeled “Sync Branch”.
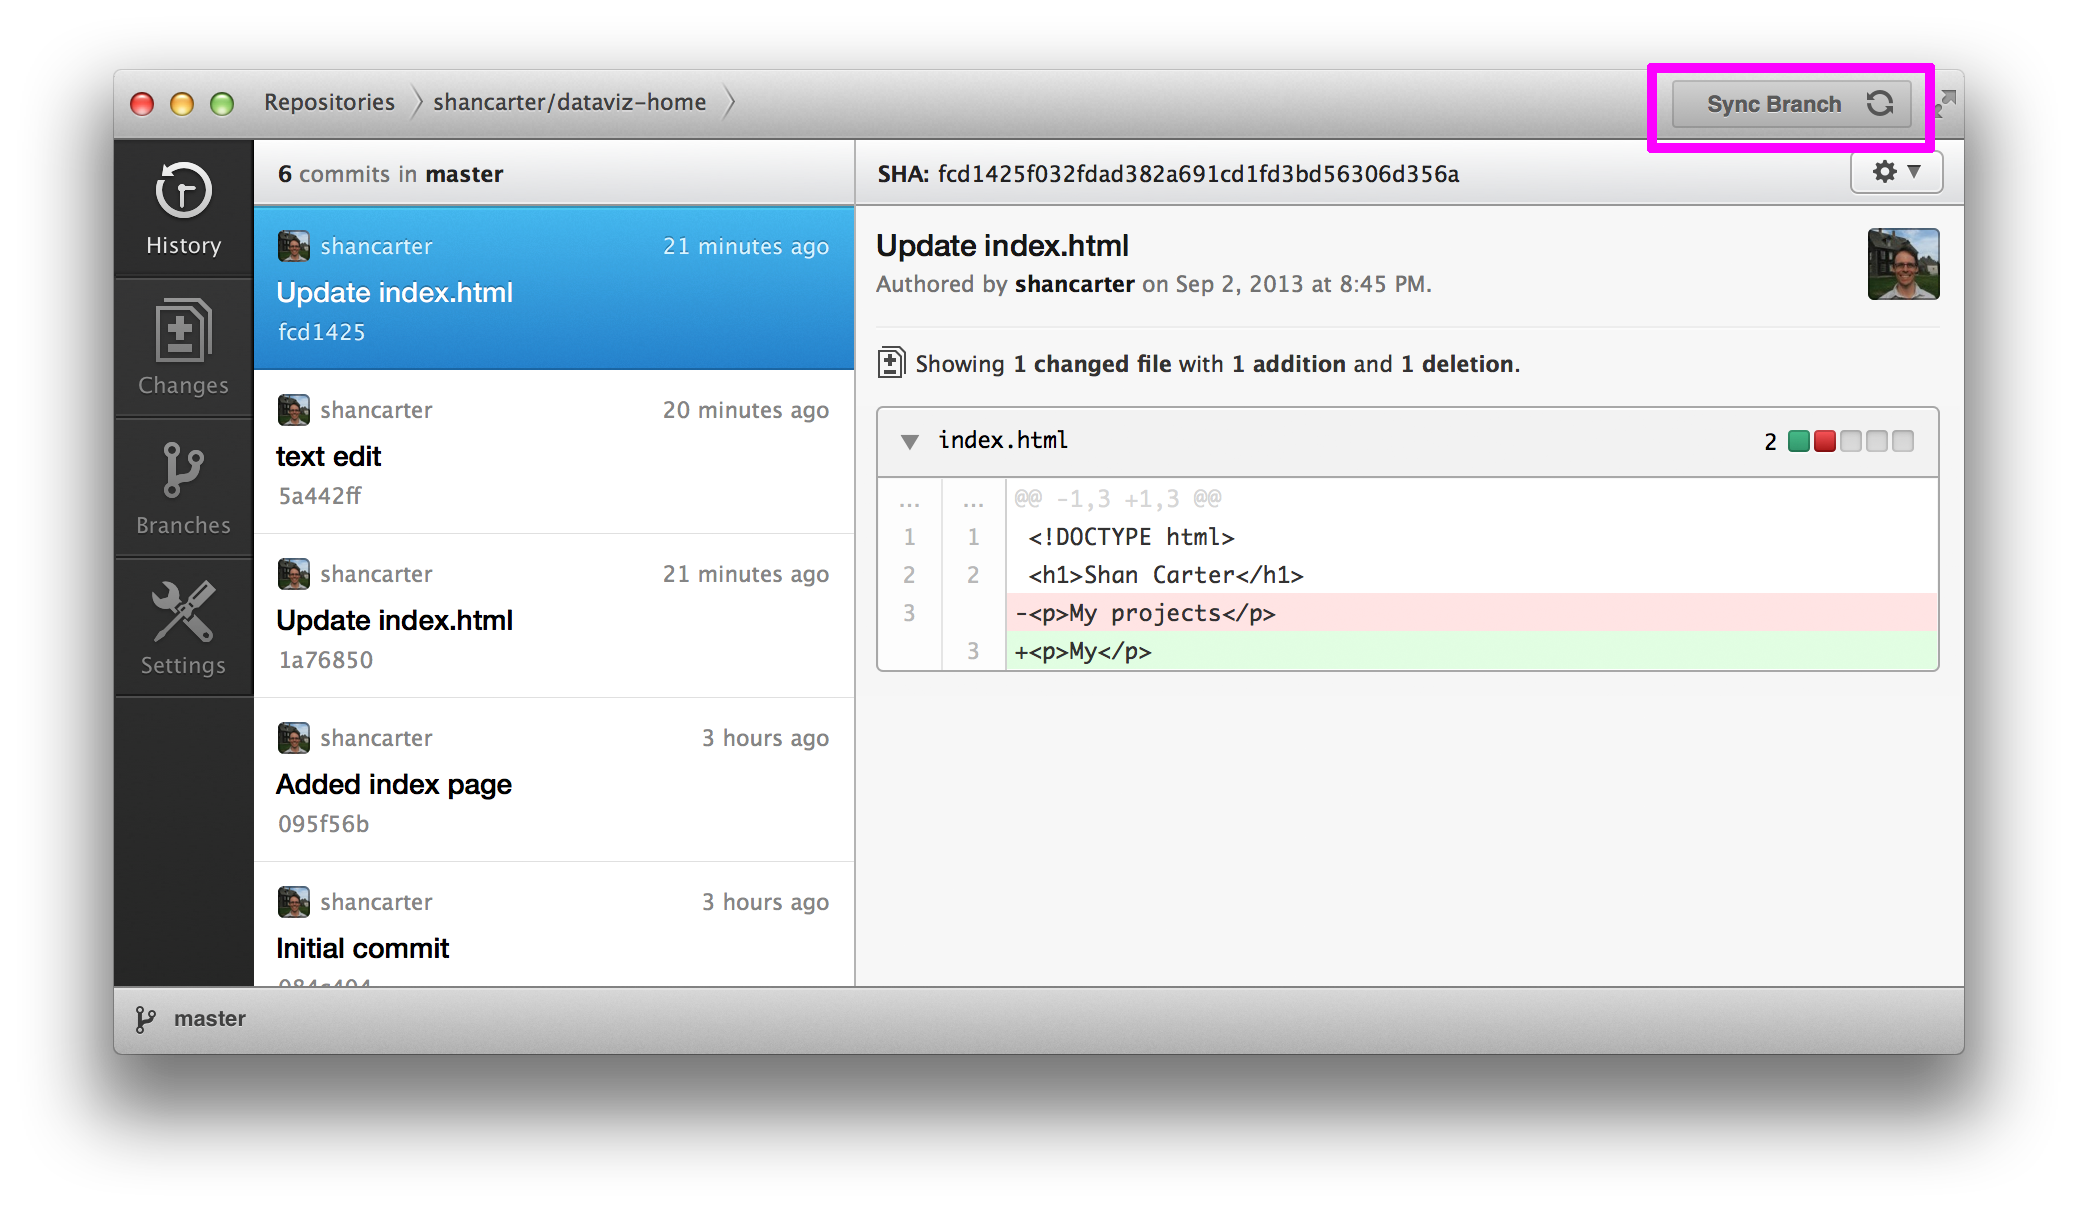
You should see a new entry in your commit history, and if you open the file up in Sublime, you should see the changes you made through the website.
Now, Let’s Publish
When we started we promised that we’d be able to publish something to the internet for free. Well, when we viewed the “index.html” file on Github, it didn’t exactly look like how it would if you were sharing a link with someone. We’ll fix that now.
-
The last major concept in Git we need to cover is “Branches”. Click on the “Braches” tab for your “dataviz-home” repo.
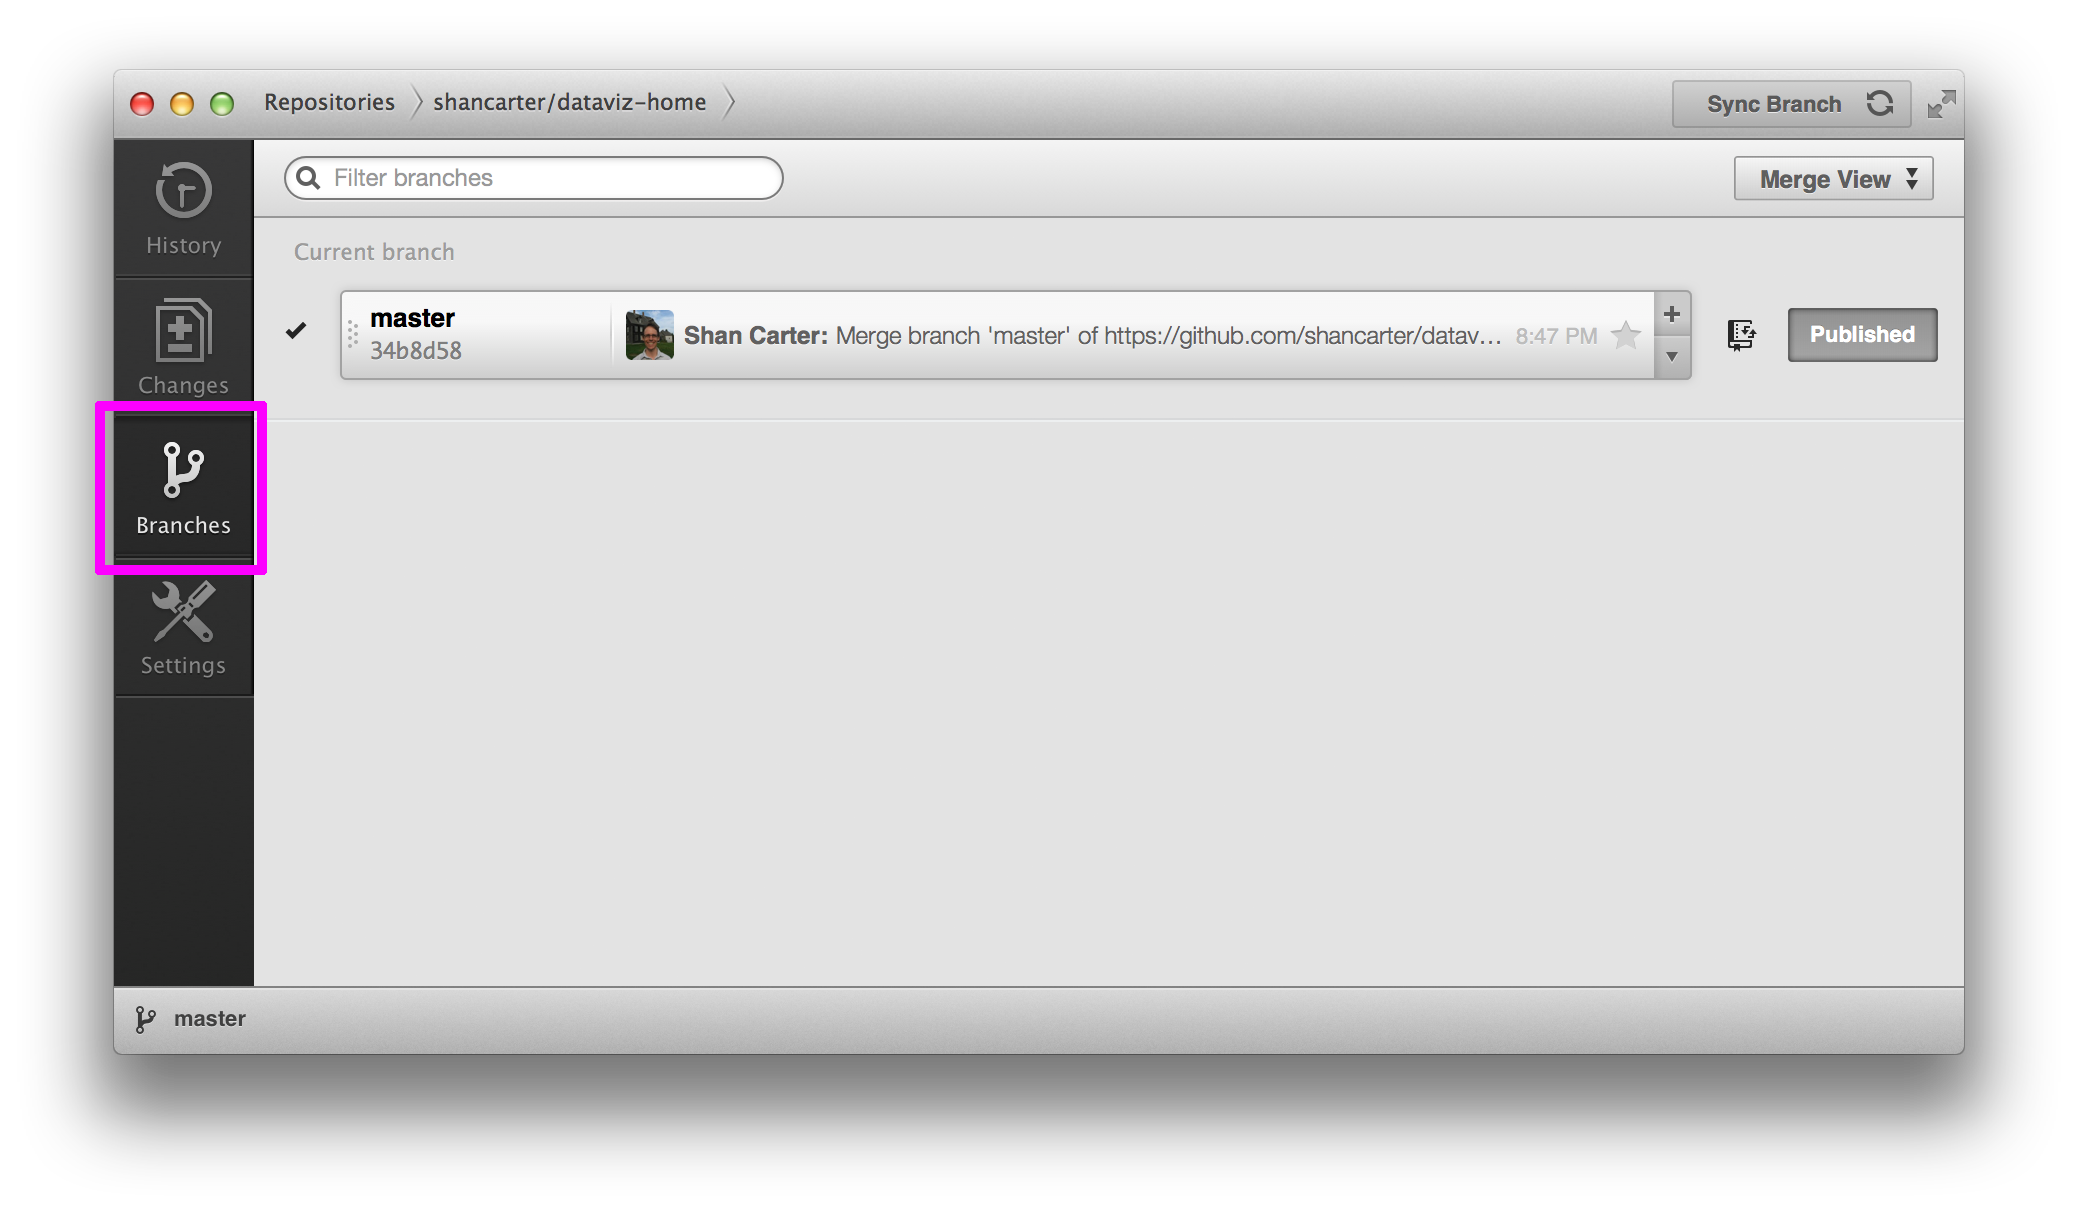
-
Click the plus button to create a new branch based on the existing branch and name it “gh-pages”.
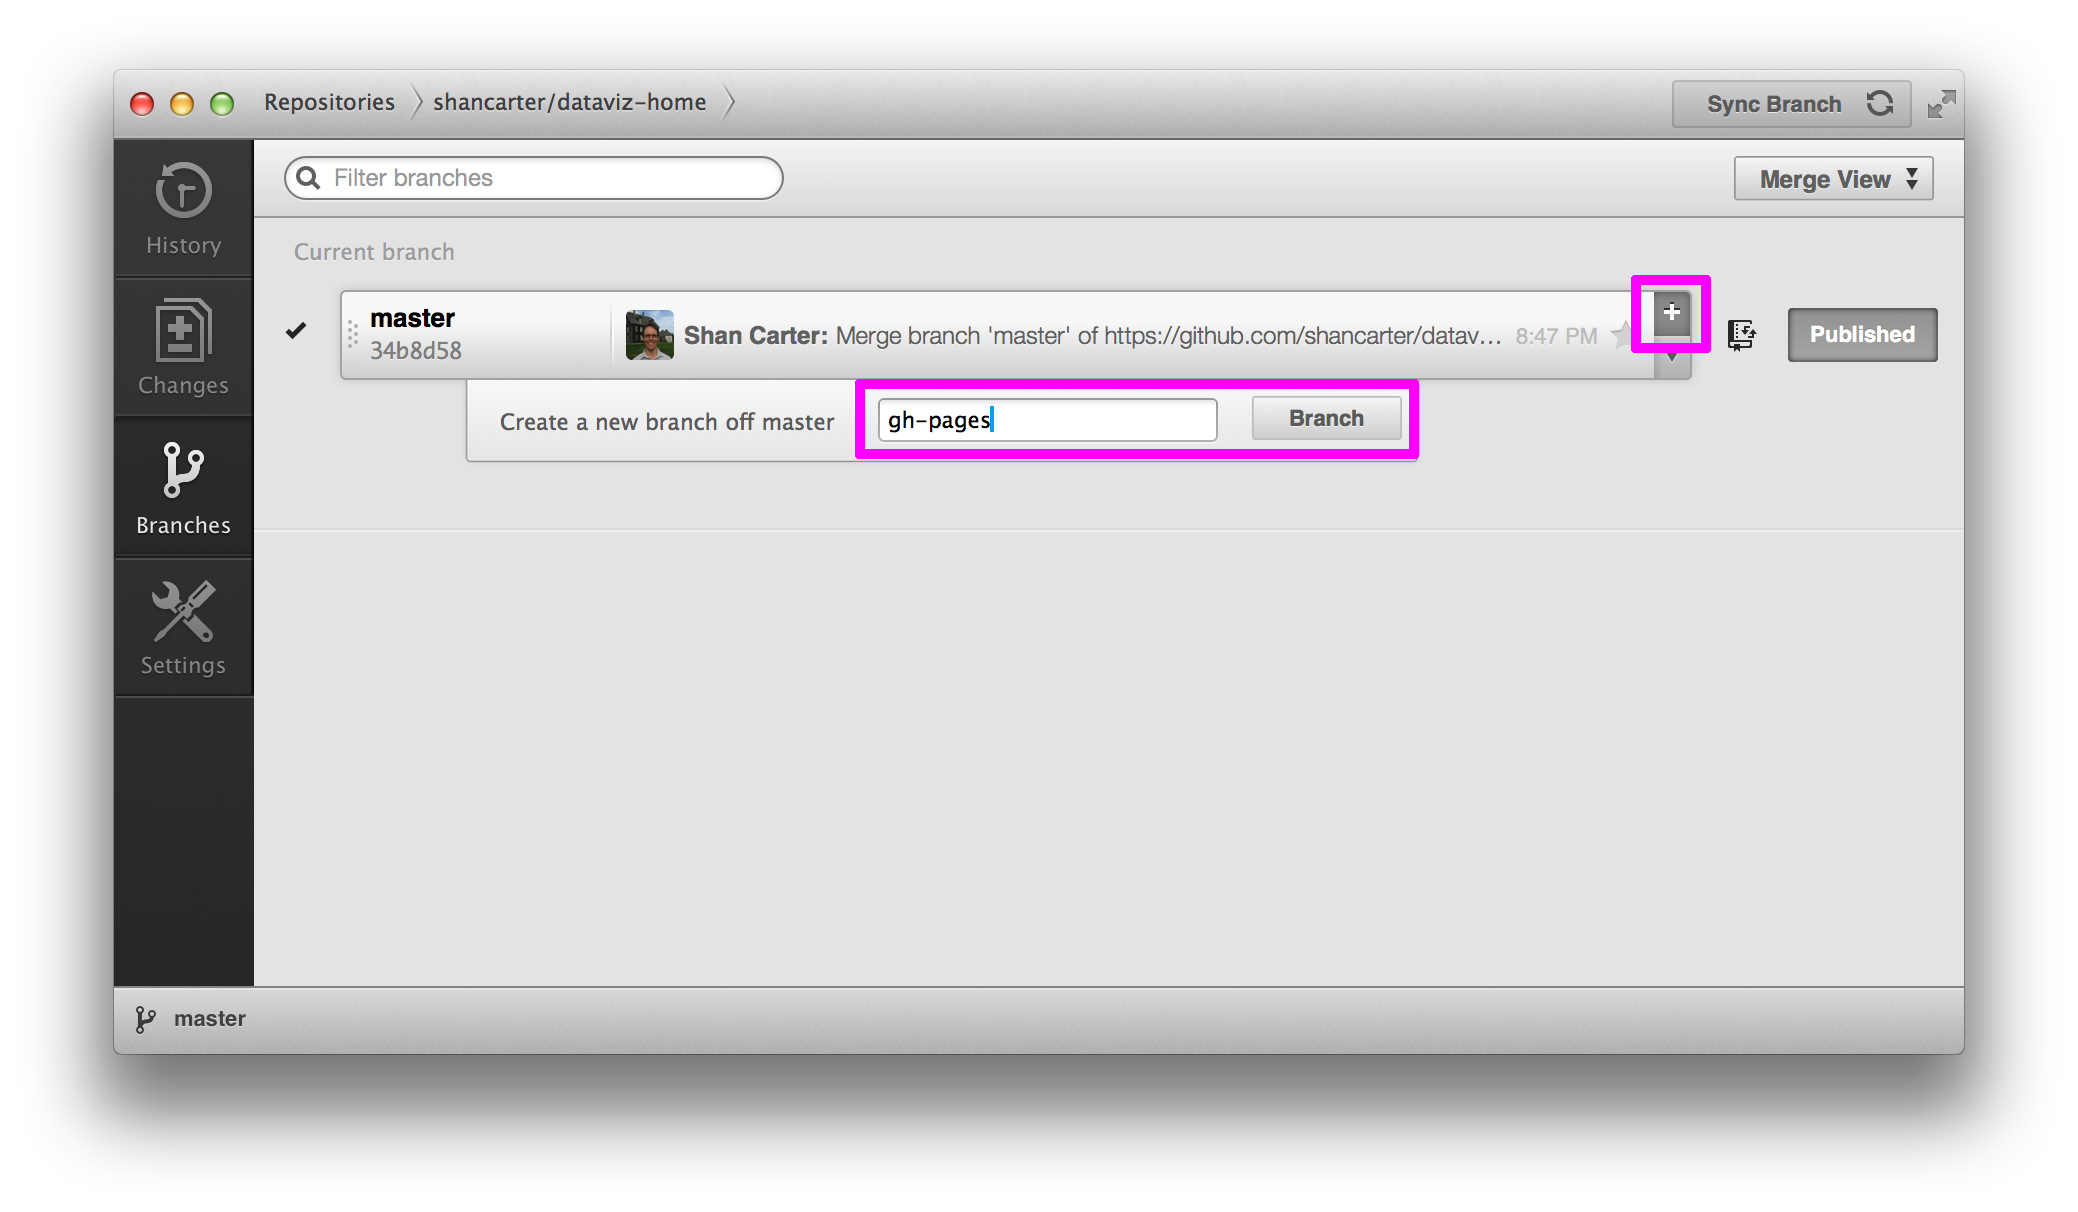
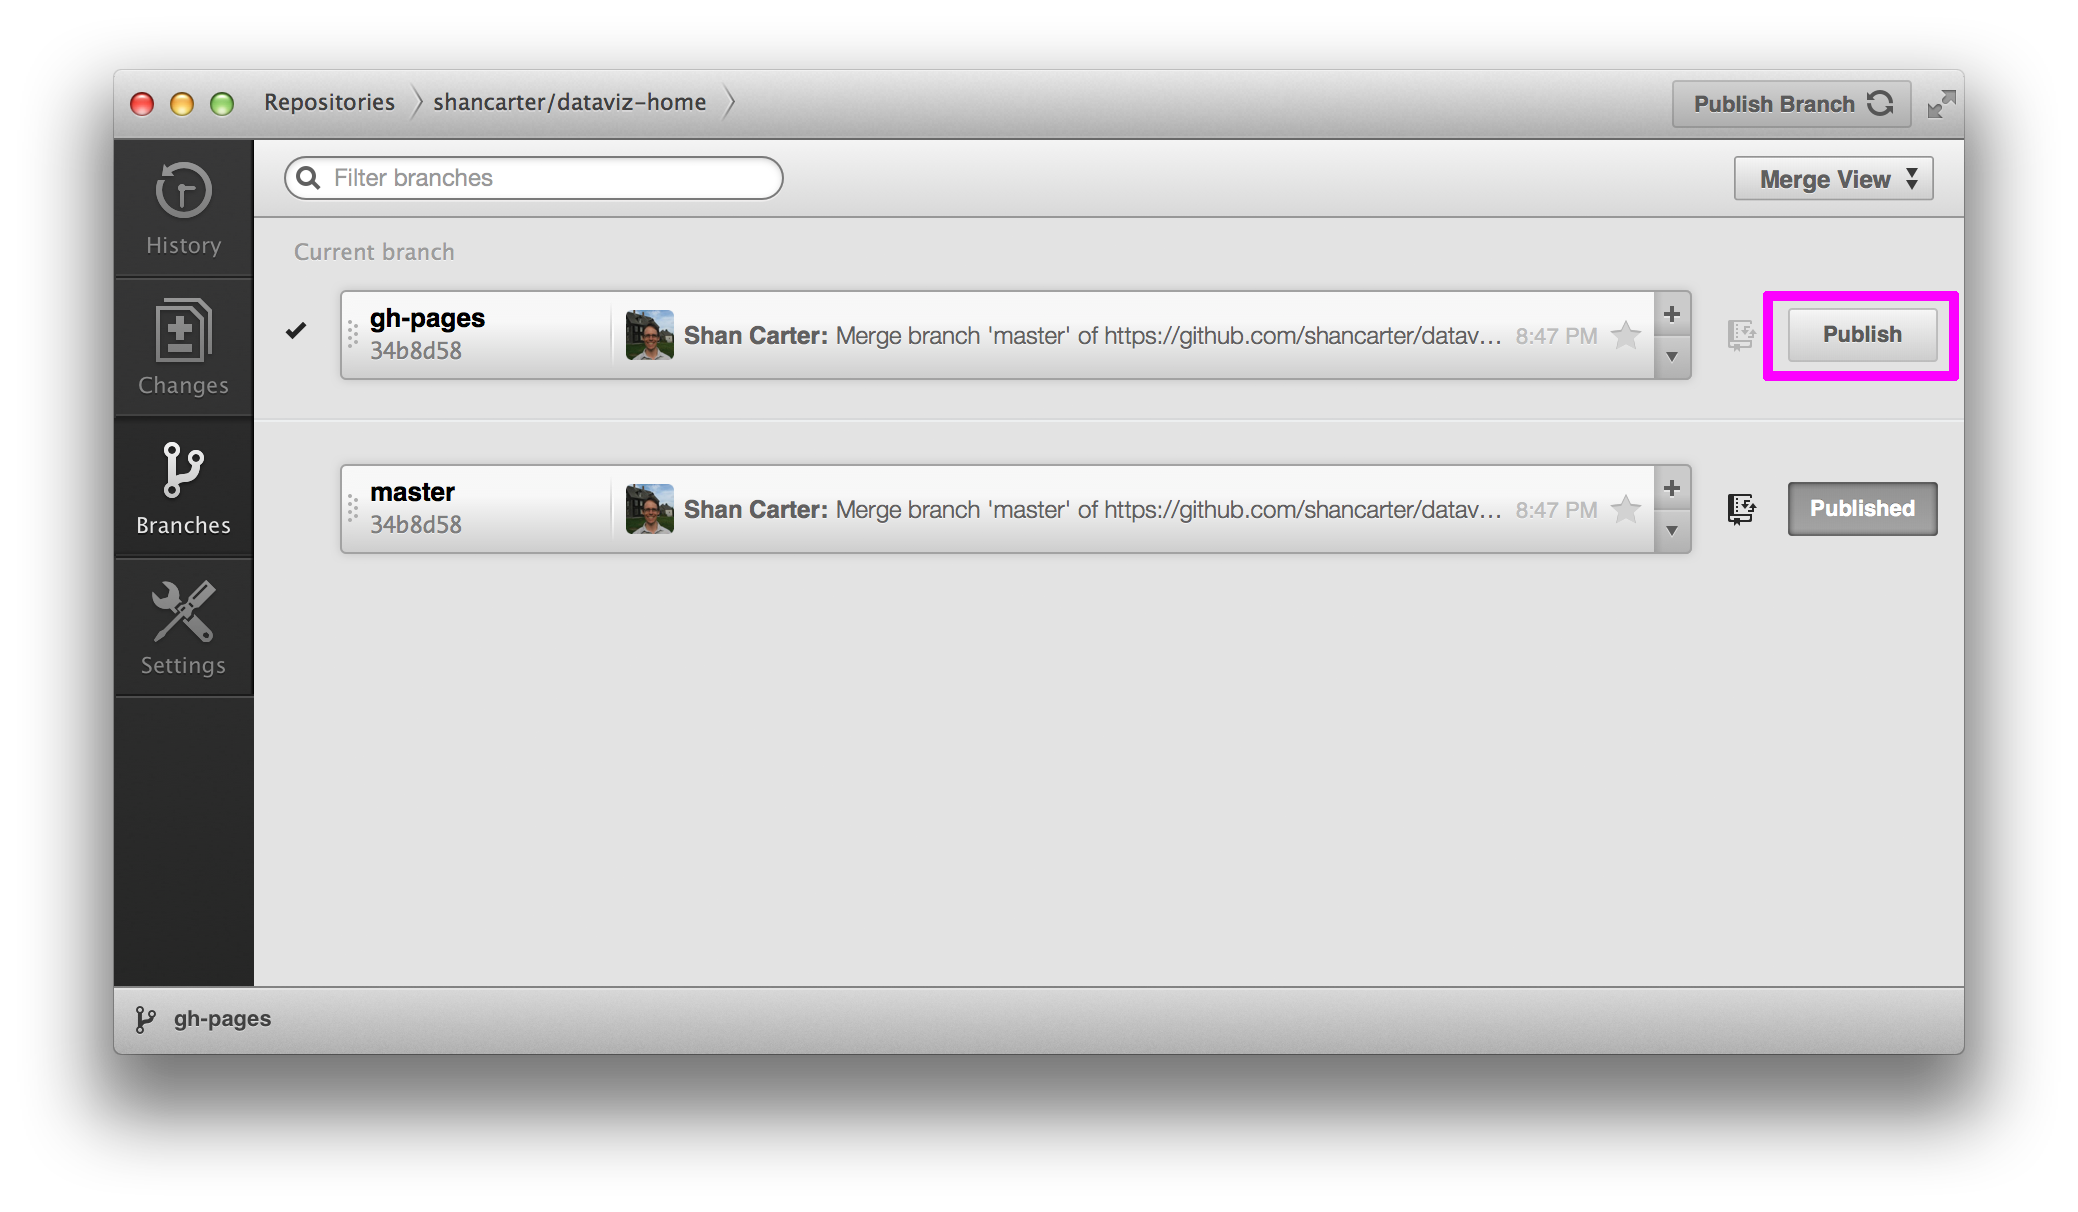
-
Then click “Publish” to create it on the Github servers.
-
This branch has a special name “gh-pages” which is short for for “GitHub Pages” and tells github that this branch is meant to be served as webpages and not code. The URLs for these Github pages follow a formula: http://[your-user-name].github.io/[your-repo-name]. For instance, mine is available at: http://shancarter.github.io/dataviz-home/. Go to your URL and see if it shows up. It can sometimes take a few minutes to be live. Read up more on Github Pages.
-
Let’s make an edit to our page and publish the changes.
-
Then, go back to the Github app, the “Changes” tab and commit and sync that change.
-
Refresh your http://shancarter.github.io/dataviz-home/ url and see if it shows up.
-
Now that we have it all setup, that is the cycle for publishing changes to your project: Edit files, then “Commit & Sync”. That’s it, all those edits will then be live on your page.
-
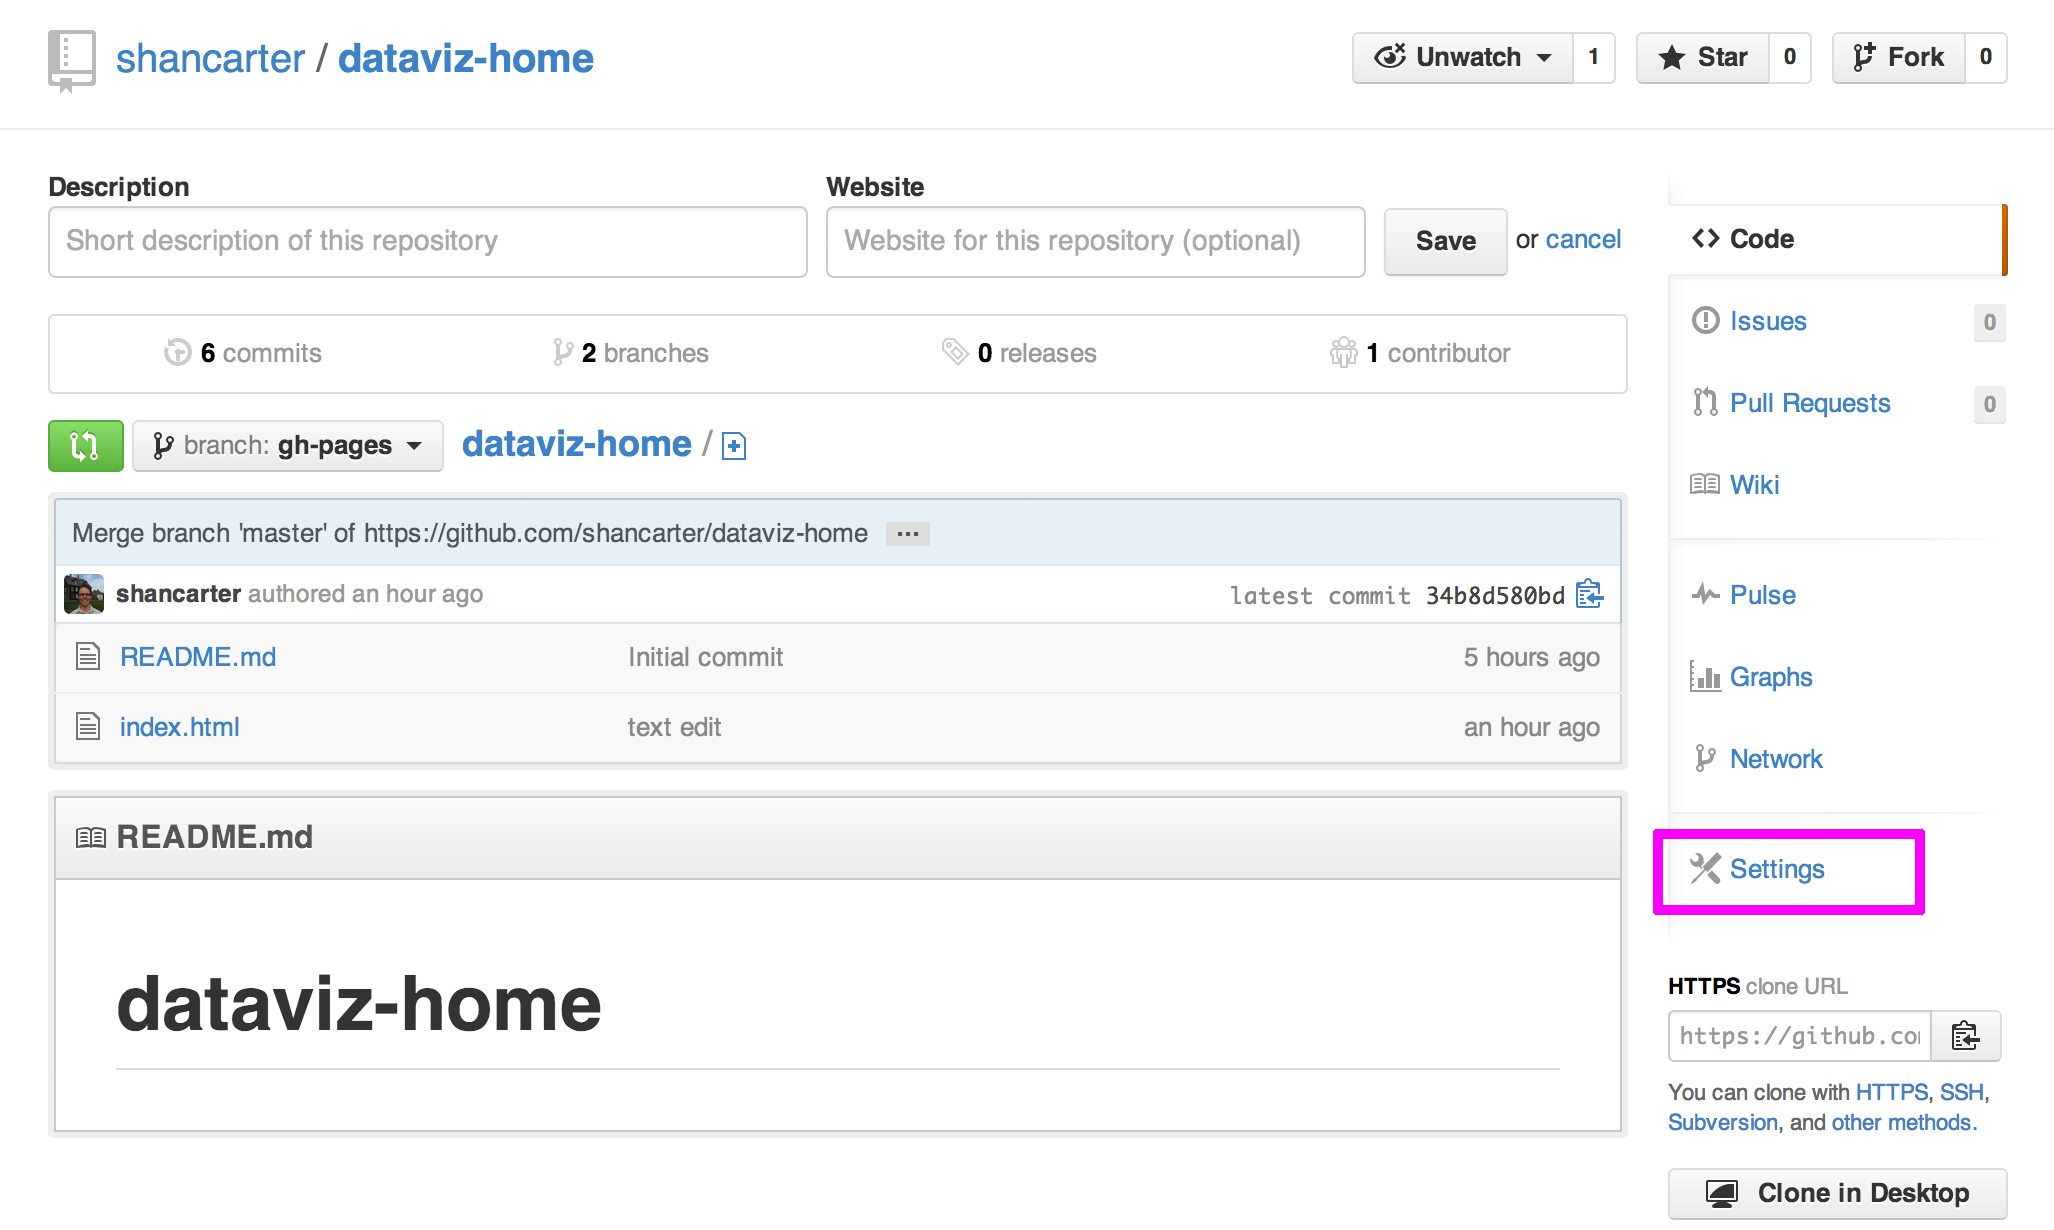
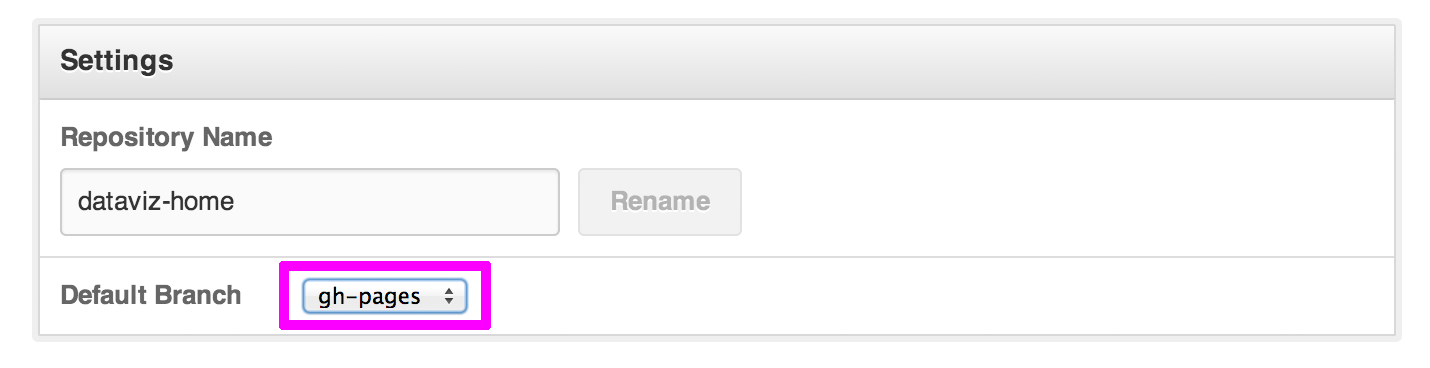
We have one last small thing to do, and that’s to set “gh-pages” to be our default branch so we don’t get confused. Unfortunately we can only do this through the Github website. The setting is located in your repos “Settings” screen.
Set the default branch from “master” to “gh-pages”.
-
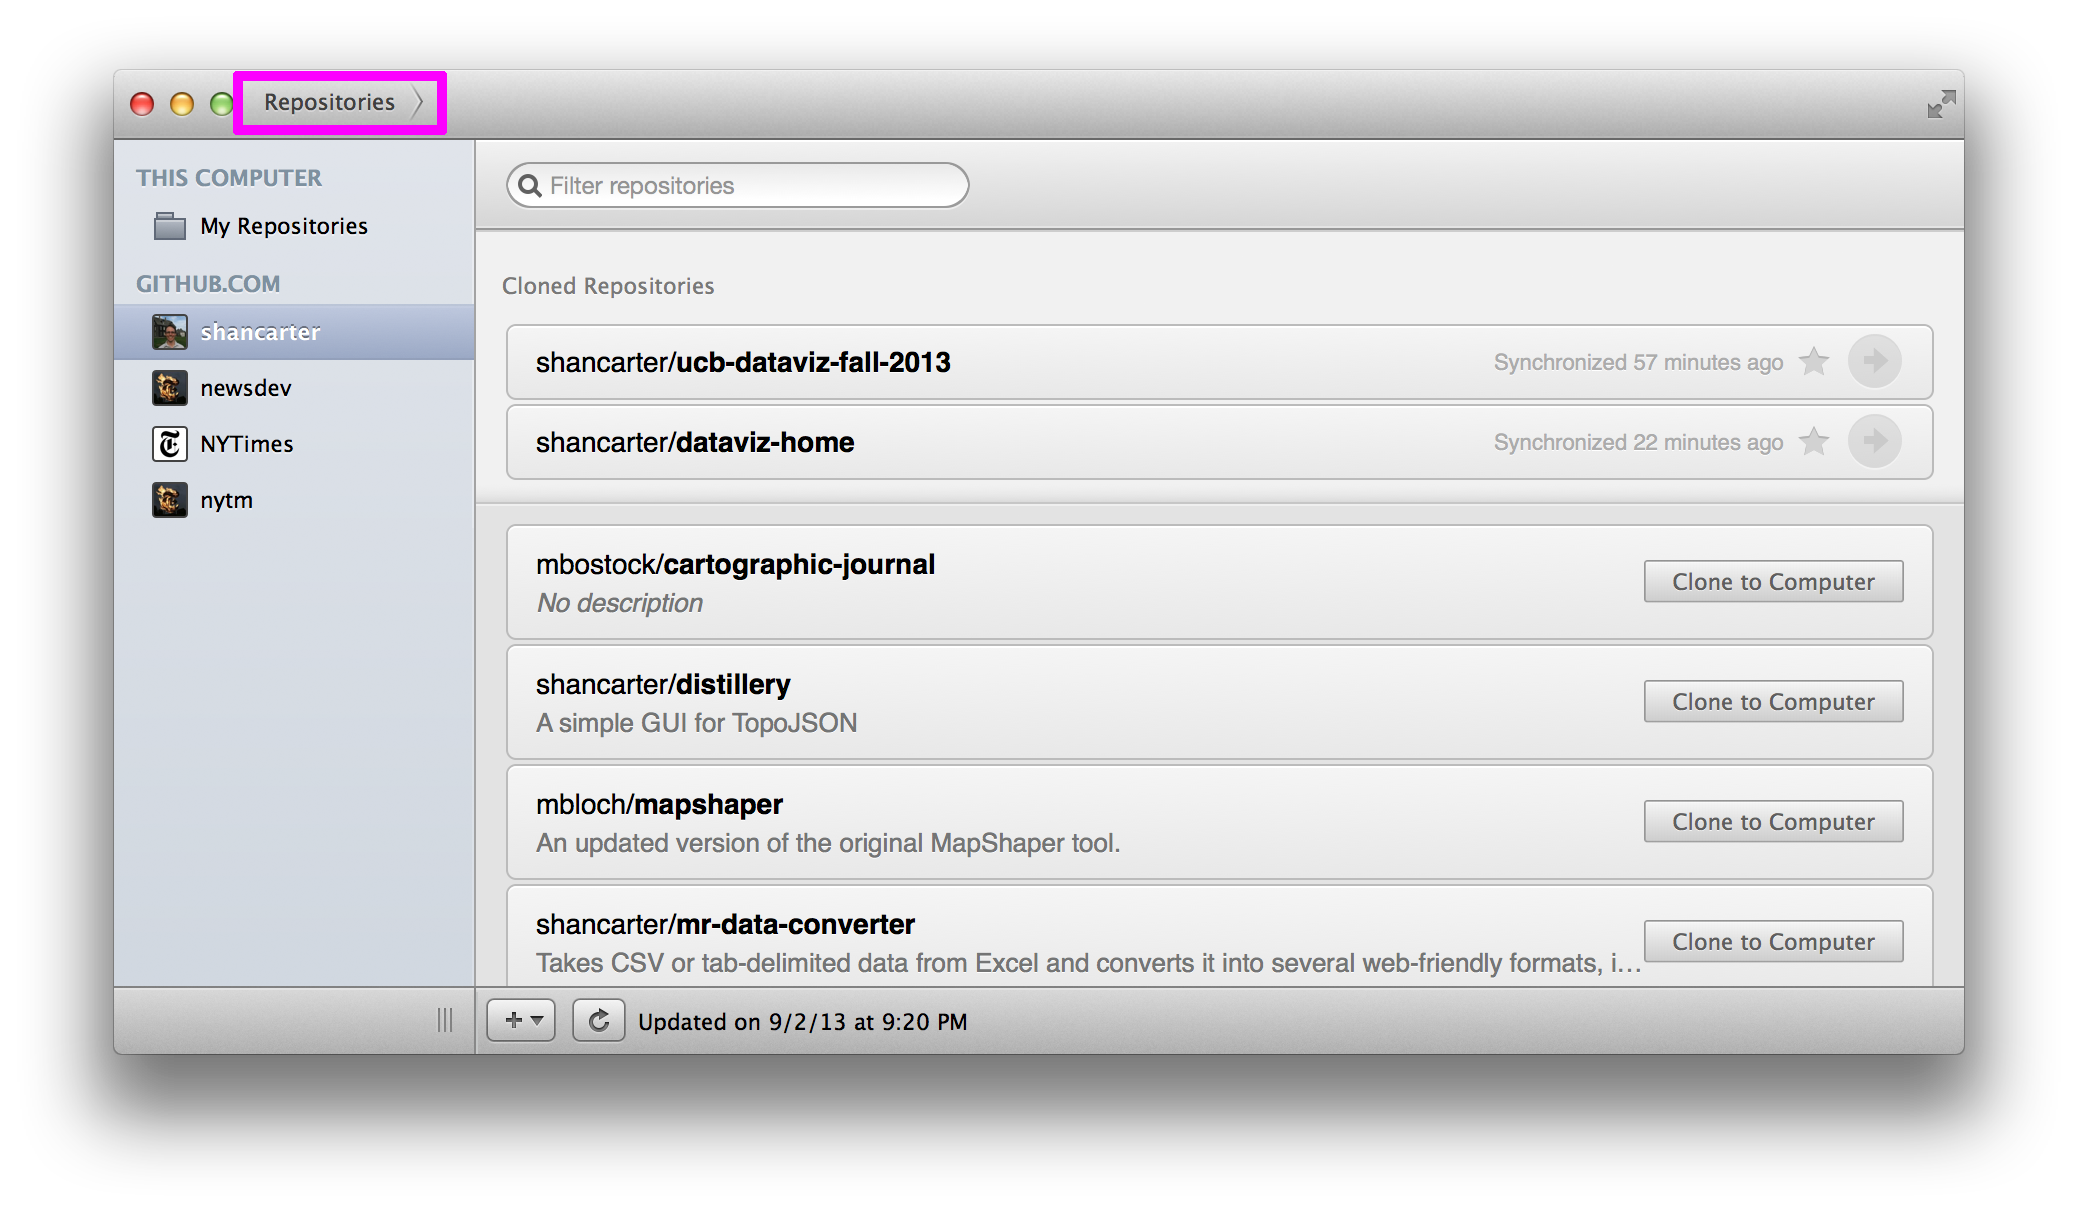
And finally, if you ever need to get back to the original screen where it lists all your repos, click the top bar where it says “Repositories >”.
-
So far this has just scratched the surface of Git and Github. If you want to go deep, here’s a very detailed overview.